Archive
How to use your office computer in the classroom
How-to:
- Click
 , click
  , type “mstsc”, click
  .
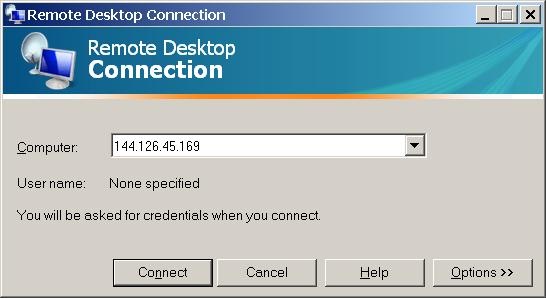
. - In the field of the upcoming window, enter your office computer’s IP number (you have to do this only once, the teacher computer will remember the number).

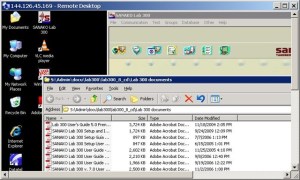
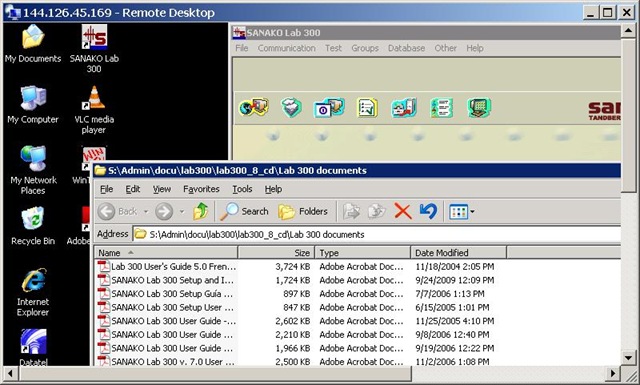
- This will connect you to your office PC, and if you run mstsc (Microsoft Terminal Services Client) in full-screen, it appears pretty much like working on your office computer.
- To find out your office IP number, on your office pc, Click , click , type “cmd”, click . cmd. On the command line, type “ipconfig”, your “IP address” appears .
- Problems? Tell OTS with a link to this post.
Benefits:
- use your local configuration with which you are most familiar also in class (e.g. US-international keyboard);
- prepare windows for classes in your office at leisure (windows will show in the state you left them in the office), saving class time;
- use the computer in class more, saving class time.
Risks:
- does not work well with multimedia. Workaround: switch mstsc to window mode and play multimedia from the local desktop of the classroom PC:
- make sure you do not have any windows open in the office which you do not want to display in the classroom
- set your online status to “busy” in Office Communicator and other instant messaging applications, or else others might send disrupting text message pop-ups while you teach
- possible screen size incompatibilities (mstsc can automatically accommodate for differences, within limits)
- always test before going live.
How to Digital Audio Record: Olympus Voice Recorder
- Layout:

- To prepare
- Turn on by pressing “OK” (14) button on front
- No external microphone needed, but do not cove built-in microphone (2)
- Troubleshooting: If the device will not turn on/function, check the battery (compartment (23) on rear, uses AAA)
- Make sure
- the “hold” switch (21) is on unlocked
- the “mode” switch (22) on the left is not set to “music” , but “voice”
- Turn on by pressing “OK” (14) button on front
- To record: press record button (4) on right
- To pause, press “record”(4)
- To end, press “stop” (5) on right
- Advanced:
- Voice Activation mode: TBA
- Troubleshooting: if the device does not record and says “music mode”, change
- To saving recordings
- On rear, press release (24) button
- Slide the recorder out of the battery compartment to reveal the usb connector (8)
- Insert the usb connector into a pc of the booths, wait until windows recognizes the device, then move the (wma) files and store them on your home (x:) drive or email them to yourself.
- Loan policy:
- to borrow a digital voice recorder, leave your student or staff card in the plastic pocket of the recorder
- Students need to ask before they can borrow one. Tutors need to collect them back by the end of the session.
- You must return the recorder at the end of the lesson. Digital voice recorders must not leave the interpreting suite premises (MGB-36).

Swift Subtitling with Input Language Japanese in Windows XP
-
Go to control panel / regional and language options / tab: languages.
-

-
Check whether (1) Japanese / Keyboard / MS IME Standard 2003 is installed. Otherwise (2) button:add it
-
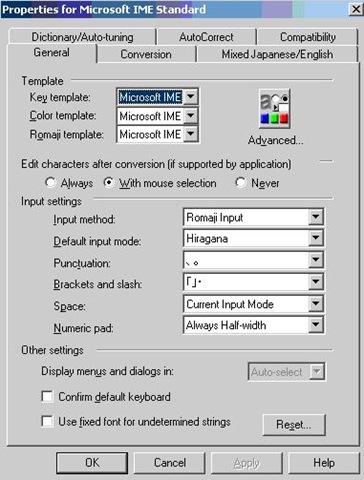
With (1) Japanese / Keyboard / MS IME Standard 2003 is installed selected, click on (3) button: properties and ensure these settings are right, then click button: “ok”
-

-
Now Open Swift.
-
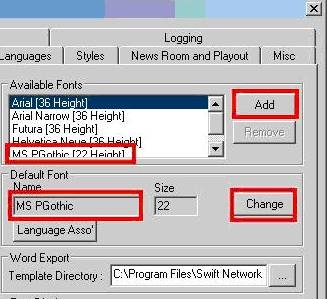
Menu file / preferences / tab: open:/ section:available fonts, button:add, add ms pgothic, section: default font, button:change, select ms pgothic, like here:
-

-
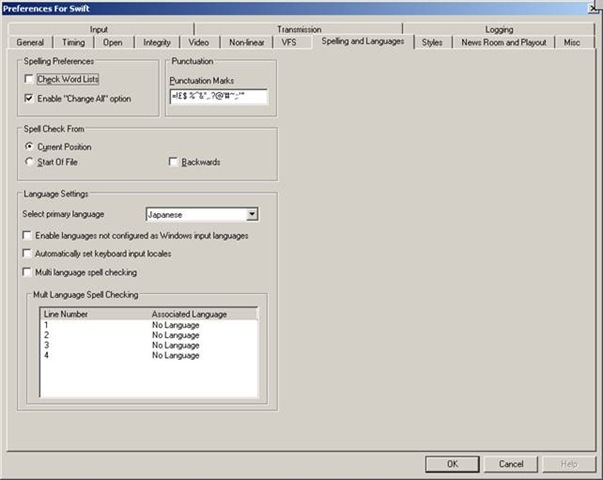
Menu file / preferences / tab: spelling and languages, select primary language: Japanese, like here, then close with button: ok,
-

-
Close the existing and open a new swift file.
-
With swift still being the active application, ensure that in the windows language bar (if you do not see all the language bar icons, right click on input language icon
 , choose additional icons in the taskbar
  ; you may also have to right-click left of the input language icon, uncheck lock language bar, then resize the bar for the additional icons to show) the right input language is chosen, like here:
 -


-
Troubleshooting: It has been observed that the IME popup editor does not appear like here:
 . This may be related to the IME option “Input type” getting reset from “Hiragana”to “Direct Input”. Double-check this. Also, if all else fails, close existing and open a new file within Swift and/or close and reopen Swift, making sure that the IME settings remain.
 -
Still won’t work? Contact me.


Relay Interpreting with the DIS 6000
Before relay interpreting begins:
- interpreter who becomes relay source: ds6132 left/in channel remains on “floor”; right/out channel: “English” (first turn your Mic off, switching with button “B/A” to out language “A” is easier than cycling through the individual languages)
- interpreter who interprets relay into target language: ds6132: left/in channel switch from “Floor” to “Relay select” : “English” (whatever button A/B/C/D).
When relay interpreting ends:
- interpreter who stops being relay source: ds6132 left/in channel remains on “Floor”; right/out channel: back to your native language (switching with button “B/A” to out language B is easier than cycling through the individual languages)
- interpreter who interpreted relay into target language: ds6132: left/in channel switch from “English” back to “floor”.

Interpreting Suite use: Policies
WHEN YOU BEGIN:
1. Always 1st log on PC
2. Ensure VCR Channel is on A1 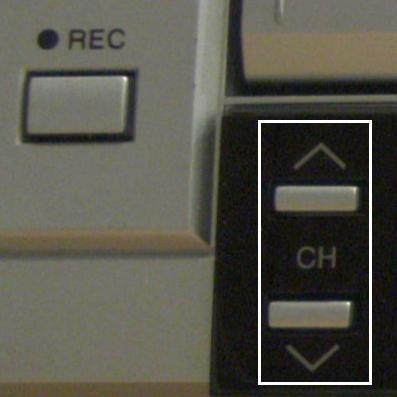
3. No food or drink (except water, on floor)
4. To speak, turn on DIS6132 microphone  (only 1 microphone per booth can be used at a time)
5. To record, wear 1-ear pad black headphones around neck
6. When listening to recorded video, adjust the BT928 volume 
WHEN YOU LEAVE:
7. Turn down the DIS6132 volume 
8. Log off the PC (do not power off)
9. Clean up your desk (handouts, water…)
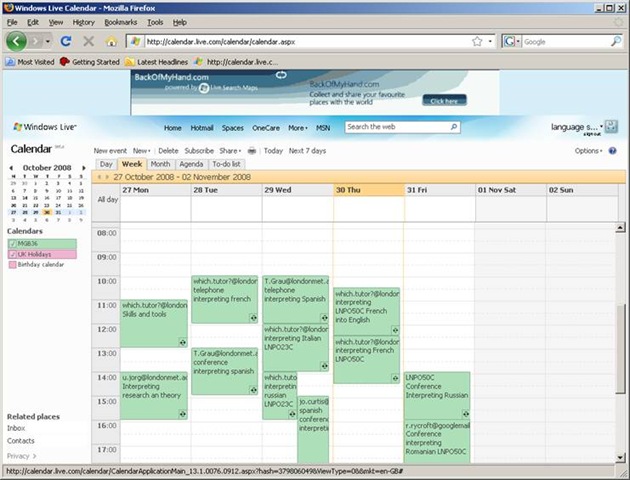
Shared Calendar for Interpreting Suite Bookings on Windows Live: How to get started
1. We have set up a *shared online calendar*:
2. 
3. Where do I find this calendar?
a. It is on Windows Live.
b. hale.language.services@live.co.uk will email you an invitation to share this calendar on line.
4. What do I do when I receive the email?
a. In the email, click ‘accept’.
i. If the link does not work, copy /paste the text link from the bottom of the email, but first remove line breaks (paste the link into notepad and make sure that the entire link is on single line).
b. If you do not have a Windows Live account, you will be given the option to ‘sign up‘.
i. If you are not asked to sign up, you may be logged in as somebody else: make sure to create your own account with your own password.
c. For best results, open the calendar with a recent Web browser: Firefox 3 or Internet Explorer 7 (if you cannot upgrade, version 6 works also, with some limitations) or better.
5. MGB36 is the coded room number for the interpreting suite. It is also the name of the online calendar.
6. What do I do next?
a. Simply add an appointment to the calendar by hovering over the time slot required and clicking on “ADD“

i. Under “Calendar”, select “MGB36” (if you add to your personal Calendar, other users won’t be able to see).
ii. Under “what”, include your e mail address so we can contact you in case of changes, as well as Module number
iii. Under “where” include if you do not need all booths (others may want to share)
iv. for additional options, like recurrence (= enter 1 appointment – recurring weekly, until end of it…, no wait: teaching period! – to book your weekly class meeting for the entire teaching period), click on “Add more details”.
b. Don’t forget to update the calendar if you need to cancel a booking.
c. If you want to see a demonstration, watch the live_calendar_shared_mgb36.wmv using Windows media player
7. Who can view the information on line?
a. Interpreting lecturers only.
b. Students can currently not access the data. We may decide later to let them view it (i.e. make the calendar public).
Did you run into problems with the calendar not explained here? View the FAQ.


Questions? Read the About. Or just ask me a quick Our Databases: Resources with calendars -- Language learning material Moodle Sites, multimedia files -- films


FAQs for LRC student staff or for students or for teachers. To search our FAQs, in the browser addressbar, add after "https://plagwitz.wordpress.com/feed/?tag=faqs+/" "+TAG1" (from tag cloud below) OR "https://plagwitz.wordpress.com/feed/tag=faqs
&category_name=" "CAT1" (from category hierarchy below). OR search both categories and tags, and multiple TAGs/CATs (connect with "," for OR-search, with "+" for AND-search), like so: https://plagwitz.wordpress.com/feed/?tag=TAG1+TAG2+...TAGn&category_name=CAT1
+CAT2+...CATn"
Other ways to find help
If you cannot find it here, look there: 5,500 Language-Learning Links and Programs for learning or teaching 150 languages
Shortcuts:Our Lists, Our Maps, LRC Staff Moodle Site,LRC Project Moodle Site, 49erexpress, UNCC Moodle, Student Recordings: s:claslcslrcsanakostudent
Learning usage samples: Sanako oral exam, Kaltura webcam presentation, Dictation with speech recognition, Sanako written exam, Chinese and Japanese interactive stroke-order practice
Test the Sanako Installer, Webbrowser Popup Konfigurator for XP, or Windows7, faster LRC TeacherPC Log-in Let MS facilitate diacritics writing by installing for you US-International keyboard layout
This is my personal blog (Google+). The views expressed on these pages are mine alone and not those of my employer. The information in this weblog is provided “AS IS” with no warranties, and confers no rights.
