Archive
Archive for the ‘headphones’ Category
Protected: LRC headset organization
2014/07/15
Enter your password to view comments.
Categories: e-infrastructure, headphones
Protected: How to get rid of “Restart your computer to apply these changes” in a deepfrozen computer lab
2014/04/02
Enter your password to view comments.
Categories: Glitches&Errors, hardware, headphones, Uncategorized
Positioning of Language Lab PCs needs improving
2014/01/11
3 comments
- Update: We worked around the issue with a male/female USB extension cord (black) to connect the Sanako USB connector (blue) into, this way, the whole setup can be aligned with the rear of the PC and won’t stick out and get in the way:

- Problem: Rear connectors of computers get disconnected or even damaged. Input (keyboard, mouse, microphone) and output devices (headset) get disconnected connected and therefore fails to work. Damaged equipment needs to be ordered and replaced, at considerable cost of time and money ($TBA per Sanako cable). It is too time-consuming to test equipment functionality (30 headsets and mice and keyboards) before each assessments and exam.
- Example of student in seat:

- We have observed these and similar damages regularly:


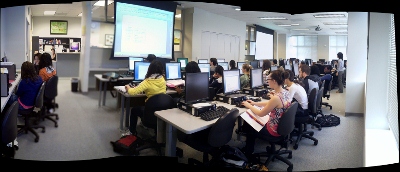
- Cause: Our language lab computer desks and rows are too narrow, for individual student sitting in front of the computer, not to mention classes moving in and out of their seats
- Other requirements:
- We need to have equipment plugged in the rear connectors of the computer and cable-tied to prevent students from trying to adjust or “fix” computers by re-plugging the equipment (often improperly, making them fail to work), and also because there is limited desk surface in front of the computers, given keyboard and mouse need to fit in front.
- For the functionality of the Sanako digital audio language lab system, we especially need to make sure, that the headset is plugged in on the same USB port in all computers.
- Solutionsthat we have
- already tried
- we have tied down the connectors with cable ties, but this has not worked sufficiently.
- yet to try: is there a way
- to permanently attach computers in a different, safer position on the existing furniture?
- or to buy and install different furniture, computers seated under desks inaccessible for end user and locked?
- already tried
Categories: e-infrastructure, Glitches&Errors, headphones, Photos, proposals, Student-Computers
furniture
LRC headset tests
2014/01/10
Leave a comment
- To improve LRC readiness – given that headsets are the most prominent component of the language center, as well as a wear and tear part –,
- every Friday during the term (see column),
- a group of expert LRC assistants, armed with the above checklist on a clip board on the reception desk,
- tests each headset (see rows) in the LRC for functionality (play, record), using the procedure outlined in step-by-step instructions linked in the 2nd column from the left above
- and reports the test results on the clip board:
- upon success, puts tester’s initials,
- otherwise marks as “not ok”, e.g.
- “no plug”,
- ”no mic”, or “mic w/ static”
- “no sound”,
- etc.
- LRC assistants should, as pictured:

- from the clipboard,
- access the instructions
- follow the instructions
- record the results
- while working side-by-side to cut the load in half.
- In addition (not pictured), they can log in on multiple computers and start working on the first pair while the last pair stills starts up.
Categories: audience-is-students, checklists, e-infrastructure, hardware, headphones, Spreadsheets
asset-management
LRC headset test on PCs
2014/01/02
Leave a comment
- Log in on a PC.
- Launch the Sanako student recorder form the desktop:


- Click the red recording button then record for 5 sec (speak into the microphone; then tab the microphone with your finger several times, to make sure you are recording through this source), then the blue stop button

- Click the green Play (from beginning):
- can you hear yourself speaking/ the noise from the tabs?

- turn your head left and right: can you still hear (sometimes a short cuts out the sound).
- If not check headsets cables as described in LRC routine walkthrough for classroom PCs (Sanako headsets) or in LRC routine walkthrough for listening and group room stations(brown headsets).
- If it still does not work, report Computer # on clip board.
LRC daily walkthrough for classroom PCs
2014/01/02
Leave a comment
- Find a time when the classroom is not busy on the LRC calendar – if necessary, do it earlier rather than later.
- If somebody else than coordinator or director is logged onto the teacher computer, tell the LRC coordinator.
- Check the projector? Turned off , screen up

LRC daily walkthrough for iMacs and printer
2014/01/02
Leave a comment
- For the iMacs,
- Check that the printer has papers (or replenish paper from the reserves shelves in coed436).
LRC daily walkthrough for listening and group room stations
2014/01/02
Leave a comment


