Archive
Posts Tagged ‘xp’
How to add control of student sound/recording volume, sidetone, restart, and more to a Sanako Study 1200 environment, using the Launch Program feature and AutoIt
2014/08/22
1 comment
- UPDATE: A Windows7 (and Vista) version – which also uses a simplified deployment mechanism – is in the works, check back for a new post here.
- In refining our Sanako classroom setup, we improved the control, that the Sanako Study 1200 affords the teacher over the student clients in the computerized classroom,
- by extending the built-in Launch Program feature
- with custom-made executables (realized in AutoIt V3) that can control the volume (here on Windows XP SP3).
- This it how it works: Launch any of the programs (what each does is in its name) to any individual/group of students or the entire class in order to do any of these things on the student computers that the Sanako out of the box does not allow you to control, and that I often wish I could do when teaching language classes in a Sanako (or other computerized classroom management system) environment, like
- controlling the volume of what the students
- hears
- records
- turning the student sidetone (= echoing back the student microphone into the student headset) on and off
- starting/pausing Windows Media Player
- launching/closing quiz files in MS-Word
- restarting an entire (misbehaving) student applications
- controlling the volume of what the students
- Here is what we have:

- Here is how using what we have looks like:

- You can now request the download of these language lab enhancing programs, including source code, here.


Request to download the digital audio lab classroom audio configuration on the fly, program and source for Windows XP
2014/08/22
Leave a comment
UPDATE: A Windows7 (and Vista) version is in the works, check back for a new post here.


Back to description of reset of classroom audio configuration on the fly program
How to use Remote Desktop Connection Manager for computer lab access instead of having to manage faculty computers
2014/08/22
Leave a comment
- We have conflicting needs for a language technology software environment: diversity, simplicity, quality, manageability. We use of software configuration management tools like TEM. However, we are sitting between an extremely diverse user base (supporting 17 languages) in our unit and a central IT support with a diverse base of units to support.
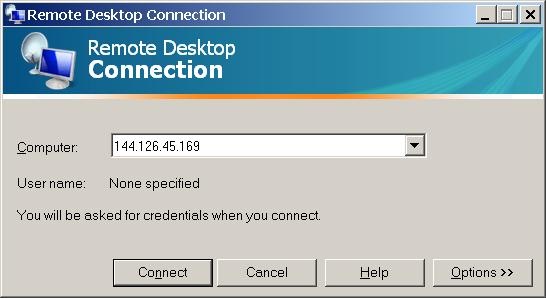
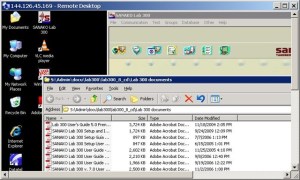
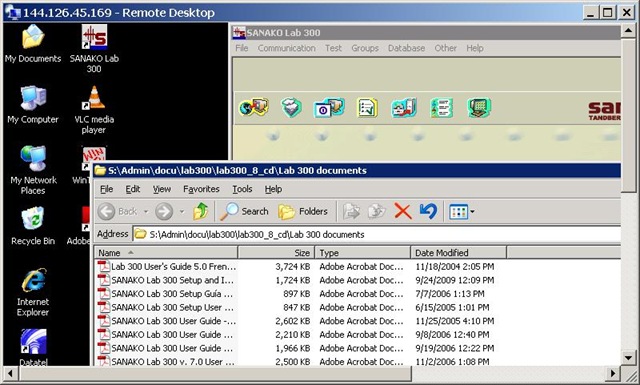
- Enter MSTSC, facilitated by Remote Desktop Connection Manager:
 . If your LRC allows for MSTSC access, consider providing faculty access to a LRC computers via Remote Desktop.
 - this is for us a great time saver, compared with maintaining subsets of software on subsets of faculty computers that are as similar to the configuration of the subset software on LRC computers as possible,
- while for faculty at the same time a realistic test bed what it will be like to operate LRC computers during class.
- We provide access to a subset (which is easily set and edited in the RDG file loaded into Remote Desktop Connection Manager, which is stored on a shared network drive so that we can update the connection files without disruption of faculty access should there be network changes) since we teach faculty not to log out currently logged in users when they try to connect, but rather choose another computer from the subset that is free to not. We exclude computers used in classes where we frequently have high-stakes exams. We also have high-stakes assignments (using Respondus Lockdown browser)
- we put a shortcut to the Remote Desktop Connection Manager on the start menu or desktop.
- Our computer numbering scheme is simple enough for faculty to navigate – besides, since we connect only to the uniform LRC PC environment, it does not matter.


How to find your computer’s name
2014/04/07
Leave a comment
- Right click on “my computer” on desktop,
- or on “[My] computer” on start menu,
- and clicik “Properties”

- or hold the windows key and press “pause /break” on upper right,
- in the window that comes up (tab computer name on XP), you can see the name:


Categories: e-infrastructure, Operating-system
7, windows, xp
Finding a balance between speed of log-in and readiness on help desk computers
2013/11/11
Leave a comment
- Problem:
- The LRC reception desk has 3 computers, each with 2 screens, one client-facing, that, when not shared during collaboration for clerical tasks, display (LRC assistants have been instructed which screen has to show which information) LRC-related information (LRC calendar, home page with news and FAQs, slide show with signs).
- However, when a teacher was bringing student to Spanish tutor after tutoring hours, I noticed, that no LRC calendar was visible at reception desk (SAFARI on rightmost computer), nor could be loaded easily.
- Upon my asking, LRC assistant reported, Firefox never comes up correctly on her computer.
- What I could observe: Firefox came up with 2 windows w/o preconfigured tabs.

- Safari came up with 2 windows , also empty.

- Root cause:
- It turned out that other students did not have this issue when logging in on the computers.
-
It also turned out that the offending student’s profile had been frozen prematurely (in an obsolete state not incorporating changes we had to do during the term to maintain functionality of the reception desk computers in a changing campus IT environment).
- Workaround: Unfreeze the computer, delete the prematurely frozen profiles, have the student log in to recreate it using current default user settings, freeze the computer, to make the computer, 3 weeks before classes end…
- Solution: not sure I have one.
- Trying to have everything set up stably at term start is not the solution, but the problem.
- How can agility be increased?
- LRC assistants need to report problems. They may need better training to be aware of problems, and need an incentive to report problems, and a culture where reporting problems is not considered a problem in itself, but an achievement.
- The LRC lost its Symantec-Ghost imaging infrastructure which it could not only use for the lab PCs, but also to maintain 3 identical computers at its reception desk. This requirement for imaging was not considered during the recent upgrade of the labs imaging infrastructure, and we do not know how to get this capability back.


Categories: e-infrastructure, Reception-desk
ms-windows, profiles, symantec-ghos, t, xp
How to use your office computer in the classroom
2009/09/29
Leave a comment
How-to:
- Click
 , click
  , type “mstsc”, click
  .
. - In the field of the upcoming window, enter your office computer’s IP number (you have to do this only once, the teacher computer will remember the number).

- This will connect you to your office PC, and if you run mstsc (Microsoft Terminal Services Client) in full-screen, it appears pretty much like working on your office computer.
- To find out your office IP number, on your office pc, Click , click , type “cmd”, click . cmd. On the command line, type “ipconfig”, your “IP address” appears .
- Problems? Tell OTS with a link to this post.
Benefits:
- use your local configuration with which you are most familiar also in class (e.g. US-international keyboard);
- prepare windows for classes in your office at leisure (windows will show in the state you left them in the office), saving class time;
- use the computer in class more, saving class time.
Risks:
- does not work well with multimedia. Workaround: switch mstsc to window mode and play multimedia from the local desktop of the classroom PC:
- make sure you do not have any windows open in the office which you do not want to display in the classroom
- set your online status to “busy” in Office Communicator and other instant messaging applications, or else others might send disrupting text message pop-ups while you teach
- possible screen size incompatibilities (mstsc can automatically accommodate for differences, within limits)
- always test before going live.
Swift Subtitling with Input Language Japanese in Windows XP
2009/03/20
Leave a comment
-
Go to control panel / regional and language options / tab: languages.
-

-
Check whether (1) Japanese / Keyboard / MS IME Standard 2003 is installed. Otherwise (2) button:add it
-
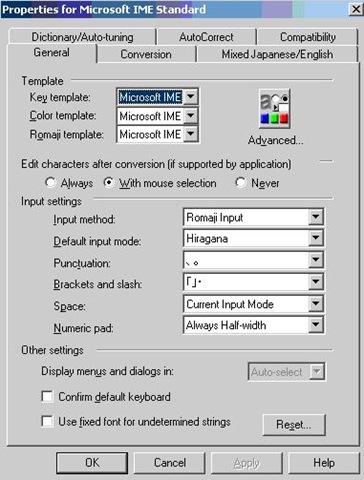
With (1) Japanese / Keyboard / MS IME Standard 2003 is installed selected, click on (3) button: properties and ensure these settings are right, then click button: “ok”
-

-
Now Open Swift.
-
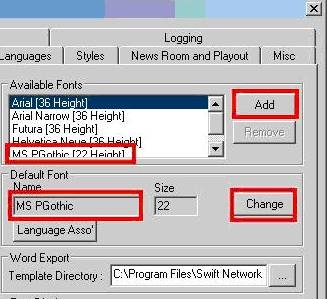
Menu file / preferences / tab: open:/ section:available fonts, button:add, add ms pgothic, section: default font, button:change, select ms pgothic, like here:
-

-
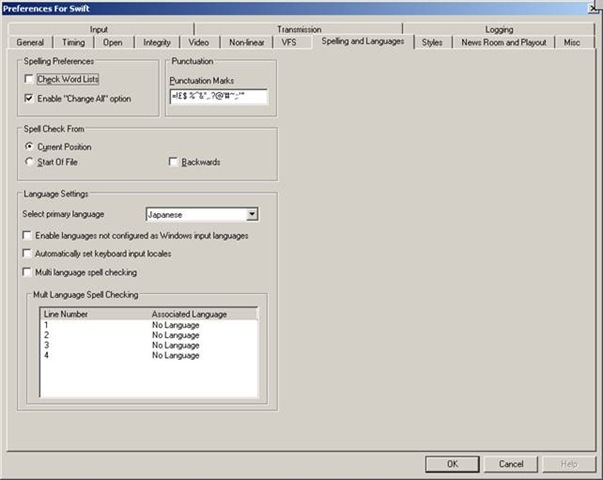
Menu file / preferences / tab: spelling and languages, select primary language: Japanese, like here, then close with button: ok,
-

-
Close the existing and open a new swift file.
-
With swift still being the active application, ensure that in the windows language bar (if you do not see all the language bar icons, right click on input language icon
 , choose additional icons in the taskbar
  ; you may also have to right-click left of the input language icon, uncheck lock language bar, then resize the bar for the additional icons to show) the right input language is chosen, like here:
 -


-
Troubleshooting: It has been observed that the IME popup editor does not appear like here:
 . This may be related to the IME option “Input type” getting reset from “Hiragana”to “Direct Input”. Double-check this. Also, if all else fails, close existing and open a new file within Swift and/or close and reopen Swift, making sure that the IME settings remain.
 -
Still won’t work? Contact me.


Questions? Read the About. Or just ask me a quick Our Databases: Resources with calendars -- Language learning material Moodle Sites, multimedia files -- films
FAQs for LRC student staff or for students or for teachers. To search our FAQs, in the browser addressbar, add after "https://plagwitz.wordpress.com/feed/?tag=faqs+/" "+TAG1" (from tag cloud below) OR "https://plagwitz.wordpress.com/feed/tag=faqs
&category_name=" "CAT1" (from category hierarchy below). OR search both categories and tags, and multiple TAGs/CATs (connect with "," for OR-search, with "+" for AND-search), like so: https://plagwitz.wordpress.com/feed/?tag=TAG1+TAG2+...TAGn&category_name=CAT1
+CAT2+...CATn"
Other ways to find help
If you cannot find it here, look there: 5,500 Language-Learning Links and Programs for learning or teaching 150 languages
Shortcuts:Our Lists, Our Maps, LRC Staff Moodle Site,LRC Project Moodle Site, 49erexpress, UNCC Moodle, Student Recordings: s:claslcslrcsanakostudent
Learning usage samples: Sanako oral exam, Kaltura webcam presentation, Dictation with speech recognition, Sanako written exam, Chinese and Japanese interactive stroke-order practice
Test the Sanako Installer, Webbrowser Popup Konfigurator for XP, or Windows7, faster LRC TeacherPC Log-in Let MS facilitate diacritics writing by installing for you US-International keyboard layout
This is my personal blog (Google+). The views expressed on these pages are mine alone and not those of my employer. The information in this weblog is provided “AS IS” with no warranties, and confers no rights.
