Archive
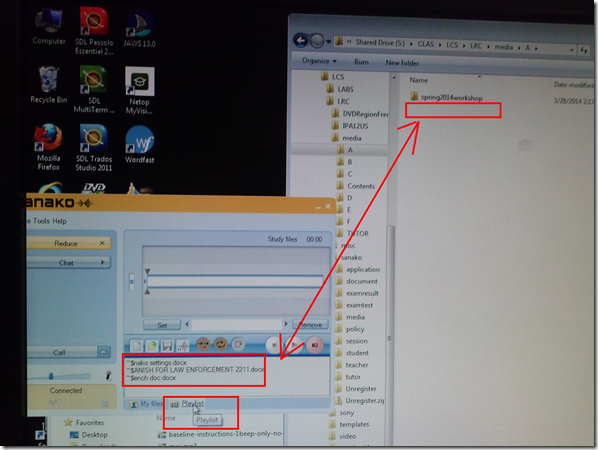
You need to click the Sanako Student Recorder Playlist and Homework tab to refresh changes
The Playlist does not sync automatically:
The playlist syncs (reflects what is actually there) when you click “Playlist”:
How to use the Sanako dual-track audio recorder
The Sanako Student Recorder (available for free here) allows you to listen on the source track while speaking/recording on the student track. Useful e.g. for interpreter practicing shadowing or simultaneous interpretation. It is as simple as pressing the red record and green play button:

After recording and reviewing, click file/save, and choose your output format.
FAQs for issues with Respondus Lockdown Browser
- New to Respondus Quizzes? Read the CTL’s write-up.
- No Photo ID (Niner ID or other state-issued)? Use the reception desk camera to take a photo with sheet, like below, we will forward it to the teacher for verification.

- Issues with starting:
- Respondus won’t open: How to bypass a Moodle Popup Window when using Respondus lockdown browser
- Test won’t open and you get a warning
- in Moodle that this test must be run in Respondus Lockdown Browser? Close your regular web browser and double click on the desktop on the Moodle Lockdown Browser Icon:
 , then go to Moodle2 from in there.
 - in Respondus that “No more attempts are allowed”, but the student has not made any attempts yet and the quiz closing date is long in the past: contact the teacher to check whether the quiz needs updating.

- in Moodle that this test must be run in Respondus Lockdown Browser? Close your regular web browser and double click on the desktop on the Moodle Lockdown Browser Icon:
- Issues with Audio:
- Students are advised to test the headsets before entering Respondus Lockdown browser assessments:
- Start Audacity from the desktop, click record: if you say something, you must see something;
- Play back to test the speakers. Hear nothing? Try the volume knob:

- (More detail here).
- Rewind-audio may get you stuck – to fix, next-page, then back (reloads page). More info: How to workaround Moodle quiz audio not playing to the end in Respondus Lockdown Browser
- How to bypass a Moodle Popup Window when using Respondus lockdown browser
 If no audio and error “pluginfile” flashes when clicking “Next”and back: notify permanent staff.
- Students are advised to test the headsets before entering Respondus Lockdown browser assessments:
- Issues with Writing:
- Lost the
 ?
?
- Clicking around nearby where it was may bring it back.
- Or
 , quickly cancel (gets you out of lockdown browser), new attempt from desktop shortcut.
 - Learn to use the installed US-international keyboard shortcuts.
 .
. - more info: Problems with accented characters in Respondus Lockdown Browser
- If your keyboard stops typing in English in a Respondus lockdown browser quiz…
- Lost the
- Issues with finishing
- If the test won’t submit, start Respondus lockdown browser on a different computer to see whether you can resume your attempt there.
- More issues? Let us know in the comments here.
If your keyboard stops typing in English in a Respondus lockdown browser quiz…
- Short answer
- press key combination LEFT ALT + SHIFT, then try typing:
- Are you back at typing in English?
- If not, repeat, until you are.
- If yes: Do not rejoice too soon. Try inserting a character with the Respondus Lockdown Browser accent bar. If it only inserts a “?“, then repeat also, until this works also.
- Long answer
- The Respondus Lockdown browser blocks use of most key combinations, but not this default combination on Windows for switching keyboard languages (and it cannot – the user may need access to other language keyboards for the quiz!).
- A user may inadvertently have switched the keyboard from the default (which works fine in most language quizzes in Respondus).
- The Respondus Lockdown browser hides the language toolbar near the notification are in the lower right, so the change is not obvious, and also cannot be undone from the menu there.
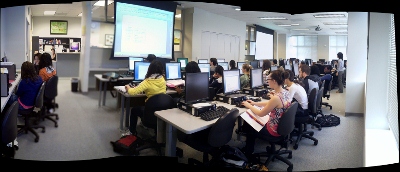
Layout of the Language Resource Center (LRC)
The numbers in the layout correspond to the numbers we posted (to facilitate teacher and student orientation and to aid in LRC temp staff troubleshooting) on the computer monitors and also (for IT staff) to the number part of the underlying computer names which can also be displayed in the classroom management systems NetOP School and Sanako Study 1200 on the teacher computer (32).

The simplest OCR options you have here
- (Staff:) Using the departmental scanner which outputs PDF to a network share (that you can link from your desktop). The PDF is searchable at least
- (Staff & Students:) Using only your desktop, at work or at home:
- MS-Office
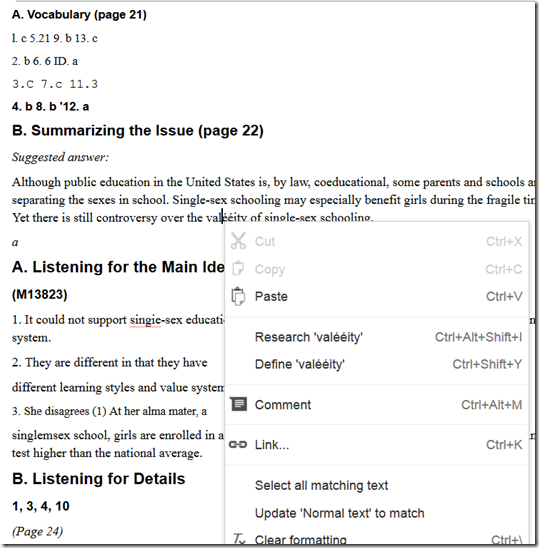
- Google Apps can also OCR the files you upload to Google Docs.
- You first need to change the default settings. Choose from hard-drive icon for file uploads, context menu: “Settings” / “Convert text form uploaded PDF and image files”.
- You may want to upload an entire folder – then you need to either use Chrome or allow the install of a Java applet.
- You may want to use not have to deal with one Googledoc for each image you upload. So bind your scanned pages (unless your OCR software already allows this – I have been restricted to “Windows Scan and Fax”) to multi-page PDFs (imagemagick’s convert command can do it for free). Note that the max upload size in Google Docs is 2mb, which restricted me to about 10 pages per document (strangely, since I had scanned to b lack and white and very small size, but the PDF size grew, likely using a less efficient encoding – might be able to optimize this).
- Google Apps uses the same OCR engine as Google Books. Not much formatting is being retained, in the below examples note the line breaks, but that is fine for me, since I am only after large chunks of text for further processing:

- I have only tested English (largely current affairs) text, but was impressed with the OCR results.
- Also, where the OCR went wrong (2-times 4 per page; also some artifacts, my scans were not very clean: Google Apps seems to handle dark spots on the page better then unstraightened lines),
- the proofreading suggestions (as usual, right click to access) are very good (better than MS-Word’s when I downloaded the files).

- Sometimes you have to consult the original image which conveniently gets put above the OCR’ed: text.


- You can download the results as MS-Word files and within MS-Word, remove all the scan images using ^g.

How to compare two MS-Word documents for plagiarism detection
- You could start with the document properties
- some students leave even the author and editing time in. However, author does not prove any wrong doing, a student may have borrowed a laptop, including its MS-word installation, to author a document and submit it
- It may actually be more of an indicator of something illicit if document properties are empty.
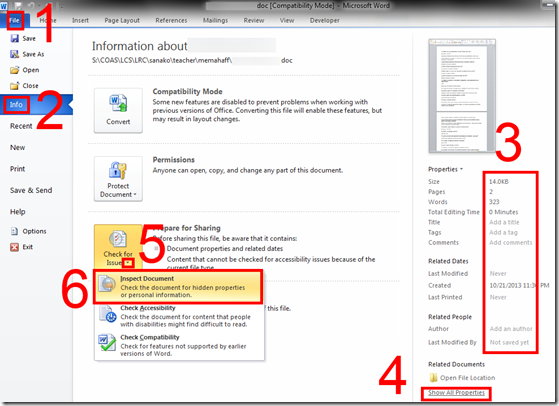
- Students have likely used the “Document inspector”:
- (1): File / (2) Info, (3) view the properties (this document looks like it had its privacy information removed), you can use (4) to view even more.

- to remove all privacy relevant information, like so: (5) unfold “check for issues”, (6) “inspect document””,
- in the window: “document inspector”, click
 , you will be given the option to “remove all”personal information:
- (1): File / (2) Info, (3) view the properties (this document looks like it had its privacy information removed), you can use (4) to view even more.
- However, removing personal information can be perfectly legitimate, unless something else was assigned. And it does not help plagiarizers cover their tracks anyway, for…
- …there is the more substantial “compare” documents feature which (even though it was developed for the legal profession, as blackline) tracks what really counts: content changes.
- Access it form the ribbon’s “review” tab:

- point the tool to your 2 documents:

- make your life easier by selecting on the “review” tab to view only content changes (formatting comparisons is noise for plagiarism detection):

- You get a handy (here blurred, but still demonstrating the amount of similarity (=black), compared with changes (= blue), between the 2 documents ) overview of (from the left)
- list of changes
- view of changes in a merged document (which you can save)
- original document
- secondary (likely plagiarized) document:

- The feature is nice, but only moderately intelligent (see the first match, I would obviously not count that as substantially different) and best used with discretion, to make it easier for a teacher to decide how likely it is that these similarities are accidental.
- In this instance, even if the teacher questions are not counted, it seems obvious that only minor alterations were made to the original document and many responses, including quite lengthy sentences, are entirely the same.
- While this *is* an instructional use, you can find happier instructional uses of MS-Word’s reviewing/tracking changes feature here.
- Access it form the ribbon’s “review” tab:
How to work around “Audio init failed” when recording in MyLanguageLab
- If you see this (or similar errors):

- Try running the browser tune-up,

- check for any new software versions (you can update Java, unfortunately only for your current session on this computer)
- finally run the voice recording setup wizard to check for results.

- Suggest you do this before entering a homework assignment, since a timer may be keeping running while you troubleshoot


