Archive
Posts Tagged ‘ms-windows-7’
Request to download the digital audio lab classroom audio configuration on the fly, program and source for Windows 7
2013/12/09
Leave a comment


Make life simpler in the language lab by disabling extra audio panels
2013/05/10
Leave a comment
- Problem: Having multiple audio panels enabled can led to too many options = sources of errors and confusion.
- Software (e.g. Saba Centra) may defaults to different audio panels (front “Microphone” preferred over a “Rear Input” that can be used as a Microphone and is the preferred device in your lab (for security, safety and ergonomic reasons).
- Students may make erroneous assumptions and try to reconfigure the PC audio by plugging cables into a different outlet.
- ESP Panel software detects plugging in of devices and asks users to identify whether microphone or line-in device has been plugged into rear input which confuses our users even more.
- Software configuration: On Dell Optiplex 760 under Windows 7 , you can
- run mmsys.cpl,
- go to tab:“recording” devices
- to disable the front panel input microphone:
- select “microphone”(that is the front input)
- right-click and choose “disable”:

- result:

- right-=click and uncheck “show disabled devices”
- to configure the “rear input”:
- select and click “properties”

- go to tab “custom” (may require having an add-on driver installed, consult the DELL driver update utility)

- check “use as microphone”
- check (optional, recommended): “microphone boost”
- select and click “properties”
- “Ok” out of all mmsys.cpl dialogues and (for good measure) restart computer.
- Test your software configuration to work (listening, recording) with the applications used in your lab:
- Sanako student recorder
- Saba Centra
- Audacity
- Voicethread
- Moodle: Audio and Kaltura (even though no webcam)
- Etc.?
- Hardware configuration
- Plug your headset microphone and speaker into the rear audio panel. Tie the microphone cable down with a cable tie. Students have managed to pull the cable through the cable tie, so tie the cable into a knot around the cable tie to prevent that
- Tape (plastic that student cannot push a plug through easily) over the front audio panel and put a label on top: “Do not use! Get help at desk!”. Instruct your help desk student staff.


How to provide students with blended human/computer-automated feedback on their speaking using a dictation with speech recognition assignment screencast
2013/05/08
Leave a comment
- Teachers often feel there is never enough time for grading students’ speaking proficiency. Fortunately, we can now automate feedback on pronunciation using Windows 7 dictation with speech recognition.
- This feature will be available for 7 languages on Windows 7 in the LRC, here is a demo for a reading exercise dictating German.
- An assignment step-by-step could look like this: Students
- record a screencast of their dictation,
- read a text to the computer in MS-Word,
- turn track changes on in MS-Word and correct the text (immediately or after dictation) where the computer could not recognize their speech,
- upload their screencast to Kaltura in Moodle.
- To grade the performance, the teacher has to review only at the very end of the screencast to see how many corrections the student needed to make (when it doubtabout the speech recognition validiiy, the teacher can easily jump to the screencast segment in question and, if necessary, override the speech recognition).
- This could be a regular assignment type since it provides the following benefits:
- immediate automated intelligent feedback for the student
- little grading overhead for the teacher, so that the teacher can concentrate her work on providing aural feedback on student recorded speech as a highlight maybe twice per term, maybe after mock exams before a midterm and final exam
- some multimedia pieces demonstrating language proficiency for the student’s ePortfolio.
- Requirements:
- a quality headset (we use Sanako SLH-07
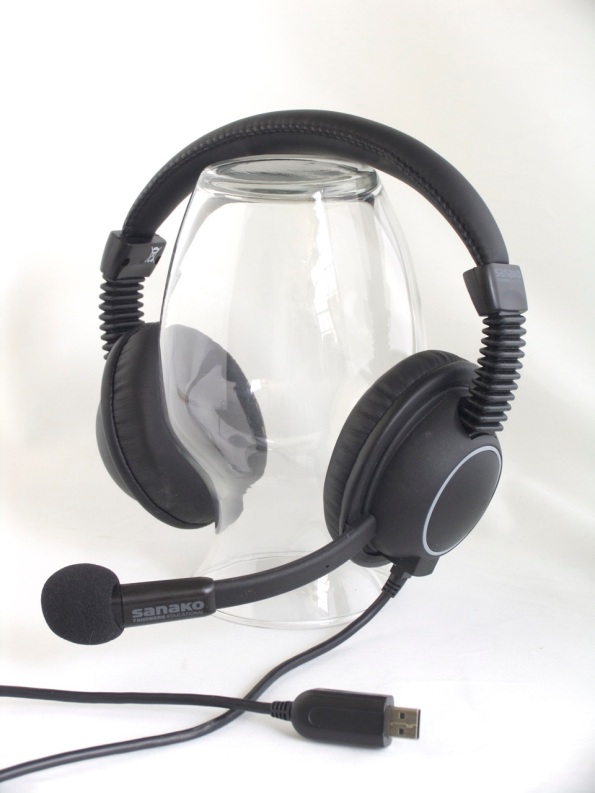 )
) - Windows 7 Enterprise/Ultimate with Language Packs,
- knowing how to switch the display language, (optional/recommended:) TBA:a simplified language switching facility,
- individual voice training data: speech recognition users have to train the computer – once, even in a deepfrozen computer enviroinment, since we enabled you to save this data to and restore it from a flash drive or personal network share space,
- a reading text (often authentic texts can be taken straight from the textbook, to fit in with the syllabus, like in this example from Treffpunkt-Deutsch 1st-year German),
- MS-Word with track changes
- screencast software (we use MS community clips)
- a way to submit the results to the teacher (we use Moodle with Kaltura video uploading (example for teachers, students do it similarly), but email could be sufficient depending on screencast length and attachment size allowance).
- a quality headset (we use Sanako SLH-07

The LRC writing input methods (“keyboards”) are not configured right
2012/12/14
Leave a comment

- In intl.cpl, we do not want keyboards installed for western and central-European (= characters a-z, merely altered by diacritics) languages, including US. We type these languages, including US-English, with the us-international keyboard extended 2.1, which has to be set as default, and that US-English extended 2.1gets checked as the keyboard for all western languages ("show more"). The regular US keyboard gets removed/made invisible to the user, and with any reasonably recent version of MS Sysprep tools, that is no problem anymore.
- For non-Western languages, the built-in windows keyboards should be "checked", and also the alternate input that we had to download and install methods need to be "checked" under their languages: MS Maren, Google input methods nee to be enabled (checked): e.g. Farsi is not enabled (checked).

How you can reuse your speech profile even on deepfrozen Language resource center computers
2012/08/15
Leave a comment
- “A [Windows Speech] profile is basically the collection of all settings and information about how to recognize your voice when using Windows Speech Recognition. Before changing the language used or letting other persons use Windows Speech Recognition it is best to create a new profile so that your current one will remain unaltered”.
- To be able reuse your effort training the computer to recognize your voice speaking in your study language – even though the LRC Windows 7 computers get reset when restarted -, you can backup, and later reload, your Speech Profile, preferably to your H:-drive.
- The Microsoft tool that allows you to do that has been put on WSRProfile.exe desktop of the LRC Windows 7 PCs. I can copy these instructions directly from the Microsoft blog page:
- Double-click WSRProfile.exe to start the WSR Profile tool wizard.

- To back up a speech profile using the WSR Profile tool, select Backup my speech profile.
- In the Select your Speech Profile dialog box, choose the speech profile you wish to back up and then click Next.

- The wizard will prompt you for a filename and location to save the file. When you have entered this information, click Next. The WSR Profile tool wizard will start the backup process of the selected speech profile.

- After the backup operation successfully finishes, click Close .

- In the Select your Speech Profile dialog box, choose the speech profile you wish to back up and then click Next.
- To restore a speech profile using the WSR Profile tool, select Restore my Speech Profile.
- On the File to Restore wizard page, click Browse and locate the backed up speech profile, and then click Next.
- Choose the speech profile you want to restore to.
- Select Use the current speech profile if you want to overwrite the current default speech profile.
- Select Create a new speech profile if you want to restore to a new speech profile. If you choose to restore to a new speech profile you will be prompted to provide a name for the new profile.
- After the restore operation successfully finishes, click Close.


Categories: audience-is-students, documentation, e-languages, English, French, German, Italian, Japanese, Korean, Mandarin, Operating-system, Spanish, Speaking
ms-windows-7, speech-recognition
How in Windows 7 multiple windows can share in one screen, and multiple screens in one window
2012/05/23
Leave a comment
- The windows management improvement I use most in Windows 7, in order to view multiple windows simultaneously (after introduction of preemptive multi-tasking in the late 80s, the operating system was renamed from MS-DOS to MS-Windows, not to “MS-Window”) is the snap-to-edge which you can access
- either by “throwing” your window (drag the title bar) to the left or right edge of your screen (top or bottom will maximize or minimize your window);
- or if you rather use the keyboard,
 + left/right arrow (+ up/down arrow will maximize or minimize your window). Keep pressing the combination and you will cycle the window position. Note that this works also across dual-screens.
- Also a welcome relief: In Windows 7 dual screen environments, you can drag and drop maximized windows between screens.
- The fact that you could not in Windows XP (where you have to de-maximize the windows first before dragging it) has caused much confusion wherever I introduced multi screen computers for teachers;
- in spite of the fact that you could not drag a maximized window away in the single screen environment that our users are more accustomed to.
- Guess I can now rather focus on upgrading a 11-year old OS to Windows 7 than on coming up with a more memorable explanation. Actually, people are currently raving about the dual-screen management improvements in Windows 8, but I that will take a bit longer to trickle through.


Questions? Read the About. Or just ask me a quick Our Databases: Resources with calendars -- Language learning material Moodle Sites, multimedia files -- films
FAQs for LRC student staff or for students or for teachers. To search our FAQs, in the browser addressbar, add after "https://plagwitz.wordpress.com/feed/?tag=faqs+/" "+TAG1" (from tag cloud below) OR "https://plagwitz.wordpress.com/feed/tag=faqs
&category_name=" "CAT1" (from category hierarchy below). OR search both categories and tags, and multiple TAGs/CATs (connect with "," for OR-search, with "+" for AND-search), like so: https://plagwitz.wordpress.com/feed/?tag=TAG1+TAG2+...TAGn&category_name=CAT1
+CAT2+...CATn"
Other ways to find help
If you cannot find it here, look there: 5,500 Language-Learning Links and Programs for learning or teaching 150 languages
Shortcuts:Our Lists, Our Maps, LRC Staff Moodle Site,LRC Project Moodle Site, 49erexpress, UNCC Moodle, Student Recordings: s:claslcslrcsanakostudent
Learning usage samples: Sanako oral exam, Kaltura webcam presentation, Dictation with speech recognition, Sanako written exam, Chinese and Japanese interactive stroke-order practice
Test the Sanako Installer, Webbrowser Popup Konfigurator for XP, or Windows7, faster LRC TeacherPC Log-in Let MS facilitate diacritics writing by installing for you US-International keyboard layout
This is my personal blog (Google+). The views expressed on these pages are mine alone and not those of my employer. The information in this weblog is provided “AS IS” with no warranties, and confers no rights.
