Archive
Archive for the ‘checklists’ Category
How LRC assistants help maintain the film collection
2014/01/21
Leave a comment
- You may find your self confronted with a box like this (at any given time):

- Has the movie already received one of our 4-digit labels?
- yes
- check it into the LRC Film collection spreadsheet
- no = Cataloguing new movies
- can you find the title of the movie in the LRC Film collection spreadsheet,
- yes: then find the label this movie has to be assigned
- no: take whatever label you need from the pre-printed sheets (coed436) and attach it to the new unlabeled movie box
- can you find the title of the movie in the LRC Film collection spreadsheet,
- yes
- put the movie, now labeled, on the stacks in proper sort order
- movie reserve shelf: consolidate it with the film collection (weekly)
- movie stacks: consolidate it with the film collection (monthly)
Daily LRC walkthrough
2014/01/10
Leave a comment
Take the clip board with this list, and, follow the instructions for the daily walkthrough, fill it out for the current row (= today’s date).
Categories: checklists, e-infrastructure, hardware, Spreadsheets
entrypoints
LRC headset tests
2014/01/10
Leave a comment
- To improve LRC readiness – given that headsets are the most prominent component of the language center, as well as a wear and tear part –,
- every Friday during the term (see column),
- a group of expert LRC assistants, armed with the above checklist on a clip board on the reception desk,
- tests each headset (see rows) in the LRC for functionality (play, record), using the procedure outlined in step-by-step instructions linked in the 2nd column from the left above
- and reports the test results on the clip board:
- upon success, puts tester’s initials,
- otherwise marks as “not ok”, e.g.
- “no plug”,
- ”no mic”, or “mic w/ static”
- “no sound”,
- etc.
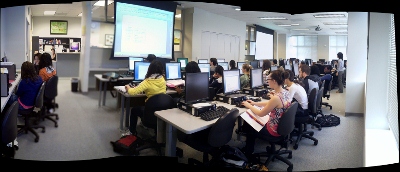
- LRC assistants should, as pictured:

- from the clipboard,
- access the instructions
- follow the instructions
- record the results
- while working side-by-side to cut the load in half.
- In addition (not pictured), they can log in on multiple computers and start working on the first pair while the last pair stills starts up.
Categories: audience-is-students, checklists, e-infrastructure, hardware, headphones, Spreadsheets
asset-management
LRC daily walkthrough for all computers
2014/01/02
Leave a comment
- Push chairs under desk
-
Remove any trash from computers desk.
- "Machine unavailable" signs

- Make sure each computer has one attached to it (or apply spares from box on reception desk).
- Put the "unavailable"sign down, where needed: Requires that you first look up which computers currently unavailable in here: http://goo.gl/RqSLme, in sheet"computers+monitors",column:"unavailable (= is the sign down), they are marked as "1" (sort the column to see).
- Make sure computers that are available are turned on and ready for students to log in.

LRC daily walkthrough for classroom PCs
2014/01/02
Leave a comment
- Find a time when the classroom is not busy on the LRC calendar – if necessary, do it earlier rather than later.
- If somebody else than coordinator or director is logged onto the teacher computer, tell the LRC coordinator.
- Check the projector? Turned off , screen up

LRC daily walkthrough for iMacs and printer
2014/01/02
Leave a comment
- For the iMacs,
- Check that the printer has papers (or replenish paper from the reserves shelves in coed436).
LRC daily walkthrough for listening and group room stations
2014/01/02
Leave a comment
LRC headset test on iMacs
2014/01/02
Leave a comment
- Logon to the iMac.
-
Double click Macintosh HD.
-
Click Application.
-
Find Garage band and double click it.
-
Save the file to the desktop
-
Speak into the microphone; then tab the microphone with your finger several times, to make sure you are recording through this source.
-
Stop then play
-
Click sound then select the output tab
-
Choose the usb option
-
Select the input tab then again choose the usb option
-
Close system preferences
-
Try again to record then listen.
-
Still not working? Check the iMac headset hardware , as described here: LRC routine walkthrough for iMacs and printer.
-
If it still does not work, report Computer # on clip board.


