Archive
Sanakoaudioconfigonthefly software utilities updated for Vista/Windows7
- (Shortcut to download – now fixed) The reason why a colleague’s signature reads: “Worrying about a large institution, especially when it has computers, is like worrying about a large gorilla, especially when it’s on fire" (Bruce Sterling) might just be that a multimedia-capable fully computerized classroom – think 30 PCs and 30 students trying not only to listen to, but record responses to exam audio – is a notoriously difficult beast to control, and all too easily spins out of the same (a classroom humming in an endless audio feedback loop is neither a pleasant nor an unfamiliar sight).
- The Sanako Study 1200 is a digital audio lab software that facilitates the use of personal computers in face-to-face class settings. However, while the Sanako Study 1200 features many ways for the teacher to control and manage the student PCs, the students’ audio settings cannot be controlled on the fly.
- Enter these little sanakoaudioconfigonthefly utilities (written in AutoIt) for Windows 7 and Vista (old Windows PX version still available here) that extend the Sanako Study 1200.
- We now use (as it is completely adequate and actually superior to to the seemingly more applicable PC control / Launch programs features which is requires the program executable to reside under the same path on student and tutor computer) Playlist / copy and launch (folder icon) and the Sanako grouping feature to send a program with your choice of action to the student PCs of your choice. In this example,
- click playlist,

- and in the window that opens, click (1) to send to “all”, then click (2) to select which program to send:
![image_thumb[3]](https://thomasplagwitz.com/wp-content/uploads/2013/12/image_thumb3_thumb.png?w=341&h=244 "image_thumb[3]")
- Files included in this release (each for 64-bit, and as source code, so that you can compile your own if you are still on MS-Vista/MS-Windows-732-bit platform):
- Change student recording levels (microphone sensitivity).
- Toggle student sidetone ( in Sanako = “listen” to this device in Windows)
- Control student playback level (headphone volume).
- Likely these programs can be adapted beyond Sanako Study 1200, but I do not remember (helpful comments appreciated)
-
- whether other digital audio lab platforms (Sony Virtuoso, Robotel SmartClass) allow for changing the student audio config on the fly
- and what mechanism (if any – but likely) they (and Sanako Lab300) provide to launch programs on the students’ computers
- Prerequisites:
- None other than your digital audio lab software and the utilities you can download below. In particular, it is not required to install AutoIt on teacher or student computers.
- However, there should be only 1 microphone/speaker per student computer in the digital audio lab. If you have more, you likely have bigger problems to solve first, but you also need to alter the source code (included) to select the microphone you want to work with (should be easy; note however, that I have not tested this scenario, for: “There should be only 1 microphone/speaker per student computer in the digital audio lab”

- Request here to download these utilities.

![image_thumb[3]](https://thomasplagwitz.com/wp-content/uploads/2013/12/image_thumb31.png "image_thumb[3]")
Group conference with all students and the teacher using Sanako Study 1200
- To set up the maybe most common language classroom activity – everybody listening or talking to everbody else (whether student or teacher) –
-
try this with the Sanako Study 1200 – plus have no student fade off because of “incomprehensible input” caused by bad classroom acoustics and self-conscious learners mumbling –:
-

-
Activity pane: discussion, start –> students can talk with each other
-
Button:talk –> teacher can talk to students
-
Student icon / popup-menu: teacher can hear students – not only the one from the student icon, but anybody in discussion.

A template for Digital audio lab model-imitation/question-response oral exams
Plagwitz making Page 2 for Google search on Sanako Lab 300?

- Why, thanks? 🙂

A better way to do student homework audio recordings in the Sanako LAB 300, using Blackboard:Assignment
-
More robust than the more common way using the default network shares of a Sanako Lab 300 – to my knowledge, up to this day Sanako Labs lack any integration with the LMS/VLE regarding the upload of student output – is using the assignment tool of the VLE which provides integration with the Student Information System and an entire infrastructure for assessment purposes (gradebook and beyond).
-
I know that some teachers use Blackboard email with attachments for assignments, others the blackboard drop-box. Some, including me, use the assignment tool which, since it appears to be far superior to the older tools, this post would like to advertise.
-
The assignment tool automatically creates a grade center column.
-
You can batch download student file submission (papers or recordings) and blackboard assignment tool puts the assignment name and the username in the file name for easier management,
-
and you can upload a graded version to return assignments to the student and include comments.
-
You can also create comments for the instructors only to view.
-
Faculty can also use track changes and insert more fine-grained comments and corrections within MS-Word.
-
-
Here are the parts of this series:
-
How the student reviews a grade Blackboard audio recording assignments: TBA.
Student attendance metering: present signin.xls and perspectives
We are working on replacing the old attendance meter which is still down:

As you will remember, we have been recording attendance last term and made this data available to you on our new network share: H:\llc\people\Sign_In_Sheet.xls. To summarize your students attendance, you can filter this data, using standard excel features.
New this term: To help you with this, we added an hard-coded MS-Excel auto-filter (see down-arrows in column headers): filter by course language, then number, then teacher, then the student in question , to summarize during assessment.
We expanded the data validation, so that we get the computer help us processing the data (sort, filter, search…).
Per your request, we added the course number, section and teacher columns to the sign-in sheet (to be manually updated at every term start – a poor man’s integration into the campus information system which had better not be done even by central services, but rather only purchased by them):

Individual teachers can use the built-in filters to drill down to their classes/students for advising/grading.

Individual student can be tracked, together with their time spent in the LLC:

Students enter in the green columns, mostly having to access only built-in shortcuts and selection boxes, while the other columns get updated completely automatically.
To enable students inputting their information directly, we have hacked together a dual screen system in the LLC entrance area.

We will also use this dual screen system for improving other LLC services, by hooking into central services. We will ask students with less than clear requests (“My professor wants me to do my homework here, where is it?”) to load their syllabus from blackboard and share their screen with the lab assistant, to assist with (not solve: that would need library resources, meaning professional library catalogue, library professional staff and library professional network and procedures) locating movies and other assigned learning materials.
For the attendance meter, this means: students can enter this information themselves; lab assistants still supervise, and collect the student ID to double check and prevent the cheating that I was approached about to fix with the prior system: signing in for friends, especially with passwords separate from university-wide passwords which there is no reason to keep secret.
Please note that this home-brew spreadsheet-based system is still severely limited in its functionality.
We could POSSIBLY (this would need setup and coordination with various central offices) automate this more, given time for the initial investment.
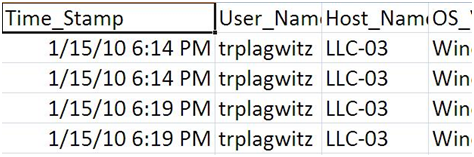
I have experimented with hooking into the swipe card system. However, students would have to be asked to swipe out also. For other reporting purposes, I have already managed to retrieve this data in this form: 
I have experimented with recording log-in (but no log-off) data on the LLC computers (another hack) in a centrally available spreadsheet, in this format:
I have inquired about using Microsoft’s SCCM (a generic software management application not meant for monitoring learning or language learning): We could gather statistics on two LLC-specific programs: the SANAKO media player and the webbrowser.exe (both, however, are likely, but not required to be used for language learning if a student prefers to do the learning in other applications). Neither would record actual files being opened.
All of these approaches, while preventing the most blatant cheating, still would not record actual language learning activity. They do not prevent students from spending their time in the LLC doing unrelated activities (like browsing sports news or playing online games) while they can do their assigned Blackboard and Quia homework from the convenience of their residence.
It is the professional systems that have been programmed with the resources from of revenue of literally thousands of campus-wide installations that can record these language learning activities.
The Sanako language lab software contains a webbrowser.exe which can not only be remote controlled by the teacher, but also be configured to allow only browsing certain (partial) urls or disallow browsing certain urls. it is also possible to apply different policies in different situations. this facility, while part of the package your purchased with the lab, has not been set up as of yet.
It would require developing policies and implementing them. E.g. one could during non-class use of the LLC only allow browsing publisher websites, including Quia.com, and Blackboard.loyola.edu and Loyola.edu (a radical approach).
One could also explicitly preventing certain websites, like Facebook (this would be more effective during face-to-face session in the LLC).
Then there are the facilities within your textbook websites (Quia) and within your course management (Blackboard, keywords for free tools being: Course Statistics, Statistics Tracking with activity_accumulator, Performance Dashboard, Early Warning System Rules, Adaptive Release rules for content, project ASTRO which is an acronym for Advanced System Tracking and Reporting Online), or as an add-on (Provost Pulse).
With the impetus being on ubiquity these days, it will have to be seen whether there are tools for Blackboard or Quia that can help enforcing that students use specific computers (maybe via IP address of computer?).
Beyond these solutions, there is an entire research area for, and software market revolving around, student retention management which also covers attendance tracking. Notable players include Hobsons EMT® Retain and Starfish Early-alert (which is run by a former Blackboard VP and can be integrated with Blackboard student data system as a building block).
I suggest we invest our limited local resources into finding better ways to integrate and train on these existing central facilities that provide information on learning (which we then can use to refine our teaching). Given current circumstances, I would recommend exploring the tracking systems in Quia and Blackboard (not restricted to being used on the LLC computers) and tracking learning outcomes (like student language recordings which the LLC can help with – not as much with the digital recording technology which is being commoditized, but rather with providing a language learning shared/collaborative/meeintg space).
Sanako Lab300 Oral-exam-question-response-recording-cycle
A 6-minute screen-cast explaining the sanako-lab300-oral-exam-question-response-recording-cycle.wmv
Please consult the transcript for a table of contents:
|
0,00 |
Here we are administering an oral exam. we are going to play pre-recorded teacher-questions to multiple students, we are going to record their responses and, at the end, we are going to collect their recordings in a batch: |
|
0,12 |
for this, we have all seats where a student is present added to group a, and have set the program source for group a to media file |
|
0,22 |
we monitor the situation on the student computers by accessing menu: other / thumbnail of group, |
|
the screen sharing is slow here, has been improved somewhat by installing more memory, the crowded screen situation has also been improved by installing a secondary monitor, use it for viewing the thumbnail window |
|
|
0,59 |
in the group a pane, we use the button: duo launch, and ok the dialogue, to open th estudent recorder on the student computers |
|
1,07 |
in the section:media source, button: file open, we access our pre-recorded question file |
|
1,13 |
in the meantime, the duo has launched on the student computers – as you can see in the classroom layout from the squares on the student seats, as well as on the mosaic thumbnail screens |
|
1,35 |
we double-click on a single thumbnail to demo to the students on the screen projector how to adjust the volume |
|
1,43 |
we click button:transfer to play the volume test file to the students |
|
we have the students record their name at the end of the sound test, to check all recorders, and to be able to identify the speaker in the actual exam file (which will be saved with only the student number in lab 300) |
|
|
we stop the button:transfer and go to menu:test:response recording |
|
|
in the pane:”response recording”, in section:”collect”, we click button:”start” |
|
|
we save the recording in a subdirectory with a meaningful name of our choice |
|
|
we ok the dialogue that informs us of the response recording |
|
|
in the window:mosaic, the encoding activity window briefly flashes on the student screens |
|
|
we browse to the student collect folder, where all subdirectories are saved |
|
|
we check the folder visibly for the right number (use select all), size or duration of audio files – |
|
|
it would be even safer, even though more time consuming, to open all the test recordings with audacity, especially on a slow computer, and check the volume graph – open audacity and drag and drop all files onto it |
|
|
4,07 |
the soundtest is a complete recording cycle. Simply repeat for the actual exam, but |
|
first close the pane:response recording, to go back to your pane:group, |
|
|
in section:program transfer, click button:group control, click icon:file/new, to flush the prior test out of the student recorders, |
|
|
in the dialogue:”save changes”, click no |
|
|
and this time load the actual exam audio file |
|
|
once the sound check is done, we could use button:lock for the students to prevent them from interfering with the computers during the exam |
Sanako Lab 300: Pairing and some basics
In the spirit of ‘Better improvised instruction and information distribution than failing classes in the lab”, I recorded a 1-on-1 instruction on how to pair students, including some other basic Lab300 features into a 5-minute screencast with voice over (open with Windows Media Player): sanako-lab300_pairing-and-basics.wmv
For an overview, see the following table of contents (when reviewing the video before starting your class in the Lab, search your webmail for the link to this instruction.)
- Not shown: teach students once and for all: always log in first;
- Grouping setup pane (all into L, then into A, excluding unused seats);
- Pair discussion setup pane (button: select for manual pair select mode);
- Not shown: teacher should use button: duo launch to facilitate student control of audio;
- Within group A pane , teacher uses button:transfer, changes program source to audio cassette:
Pair discussion setup pane : “re-pair”, using button:cancel all, button:random to have Lab 300 software choose pairs; - Within group A pane , teacher uses button:headphone for talking to group (not shown: remember to undo when finished!)
- From classroom layout: teachers clicks student icon to bring up student pane;
- From student pane, teacher views student screen, listens to student (or pair), uses student button:intercom for talking to student (or pair);
- From top menu: Other / thumbnail view of group: teacher brings up Mosaic window, to monitor (“police”) entire group screens; translates what you see to individual student, and uses button:lock (keyboard, screen or both) to prevent students from not staying on task [Demo this in first lab class to your students, using the screen projector , and hopefully they will hopefully stay on task];
- From menu: Other/ thumbnail view of group, teacher brings up Mosaic window and double clicks student screen to control individual student computer (e.g. to close a web browser – another way to police, less effective, but possible; better used for collaboration) . [Better policing options can be set up in the using the Lab300 web browser).


Questions? Read the About. Or just ask me a quick Our Databases: Resources with calendars -- Language learning material Moodle Sites, multimedia files -- films


FAQs for LRC student staff or for students or for teachers. To search our FAQs, in the browser addressbar, add after "https://plagwitz.wordpress.com/feed/?tag=faqs+/" "+TAG1" (from tag cloud below) OR "https://plagwitz.wordpress.com/feed/tag=faqs
&category_name=" "CAT1" (from category hierarchy below). OR search both categories and tags, and multiple TAGs/CATs (connect with "," for OR-search, with "+" for AND-search), like so: https://plagwitz.wordpress.com/feed/?tag=TAG1+TAG2+...TAGn&category_name=CAT1
+CAT2+...CATn"
Other ways to find help
If you cannot find it here, look there: 5,500 Language-Learning Links and Programs for learning or teaching 150 languages
Shortcuts:Our Lists, Our Maps, LRC Staff Moodle Site,LRC Project Moodle Site, 49erexpress, UNCC Moodle, Student Recordings: s:claslcslrcsanakostudent
Learning usage samples: Sanako oral exam, Kaltura webcam presentation, Dictation with speech recognition, Sanako written exam, Chinese and Japanese interactive stroke-order practice
Test the Sanako Installer, Webbrowser Popup Konfigurator for XP, or Windows7, faster LRC TeacherPC Log-in Let MS facilitate diacritics writing by installing for you US-International keyboard layout
This is my personal blog (Google+). The views expressed on these pages are mine alone and not those of my employer. The information in this weblog is provided “AS IS” with no warranties, and confers no rights.
