Archive
Sanako Study 1200 Workshop Spring 2011
Those who wanted to, but did not make it to my introductory training for the newly installed Sanako Study-1200 in LRC COED434 might want to have a look at the unedited screencast footage of the teacher computer that I recorded during this session (for Windows Media Player on Windows, if necessary, resort to LRC PCs).
Our Office 2010 & Office365/Live@Edu/Live not yet @Edu/Ninermail Upgrade: A running log
- Just logging some notes, observations, issues, step-by-step instructions…
- Office 2010ff install (office2010-full-install-labadmn.wmv [all links are to the folder only, choose screencast by name):
- 0:00-2:00: you can easily install Office 2010 from the ISO file without physical CD media, if you first install the free Magic Disc, then from the system notification tray, mount the ISO file to the , open the pseudo-drive from Explorer, which starts the installer through Autorun
- 2:00-4:00: since we do not want frozen imaged lab computers to ask for the installation media “on first run”of Office features, we choose button:customize, tab:installation options: “run all from Computer” (top – level selection is sufficient, rest of video is looking around), then button:upgrade
- Lots of waiting ensues…
- At the end, 28:55, “Microsoft office professional plus 2010 encountered and error during setup”, also the installer complains once about another instance running, then 38:12 asks for rebooting,
- Office 2010 first run (office2010first-run-excel-web-app-test.wmv):
- after reboot, the installation seems to have completed
- changing Office update policies seems to be not allowed
- file /save&send / save to web / windows live / log in / browse to a folder / give a filename:

- type something, save and exit
- in web browser, open windows live:
- log in, go to menu:SkyDrive, browse to the folder, find the file, click on it to view in browser,
- from top menu, choose edit in browser, type something, save,
- from top menu choose edit in excel, wait for download to open, type something, save&close,
- go back to web browser, open the update document from the right users (lab staff).
- sharing with windows live
- first uncc-LRC needs to make some friends:
- eventually, we want the staff of the uncc-LRC be able to use these online extensions of the most common tools in our work environment, MS-Windows and MS-Office. For this, we need to wait until live@edu/ninermail is up, so that we can invite lab staff using their @uncc.edu email addresses
- for testing purposes, I have invited myself and the lab coordinator using their personal Hotmail/live addresses
- friends need to accept the invitation email – and even on Hotmail/live mail, look for them in their Junk mail folder (this has been one of the unresolved mysteries of inter-office politics at Microsoft since at least 2007).

- second, in SkyDrive, share your files with these friends, and with the right permissions
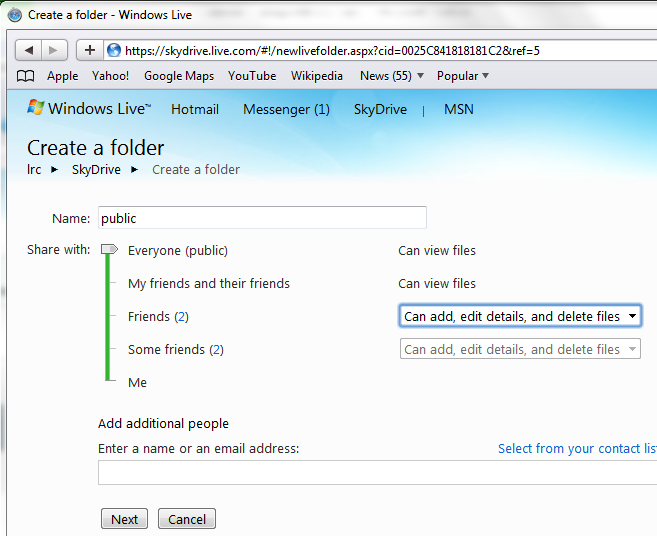
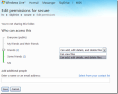 a sharing policy, per folder, needs to be decided upon
 - uncc-non-secure permissions: all view, friends edit:

- uncc-secure-settings: only friends view and edit (shall we limit editing to some friends? permanent staff?)
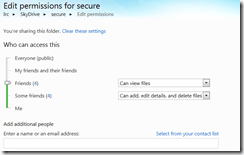
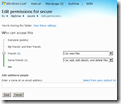 note that some granularity of permissions is already supported, like
- folder:”secure”- “friends”:”can add,edit,delete”
- folder:”secure”- “friends”:”can read”
- folder:”secure”- “some friends”:”can add,edit,delete”
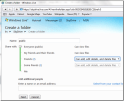 note that you can give read, but not write access to files beyond the circle of your friends (“friending” within the organization should, however, become are more acceptable option when/if live@edu will allow for @uncc.edu accounts, and interesting, since it offers disintermediation for office network admin tasks).
 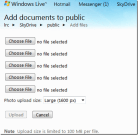 you can add files through a standard web-interface, or a more advanced Active-x control (looks like your mileage may still widely vary outside of Internet Explorer which is even more confusing when the ActiveX interface is offered in Firefox, but shows glitches). Note, however, that opening a local file in Office 2010 and save&share to SkyDrive is more attractive – however, will you in MS-Office see the folders that are merely shared with you to add to? Does not look like it. Stay tuned…
 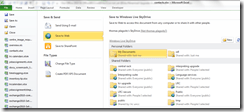 . one can still upload the spreadsheet from the web browser, then, also from a web browser, click “open in excel”. From then on, one can open it ore easily from the excel File / history shortcut. I am still working on figuring out how to map SkyDrive folders to local drives (it worked for one set, but other mappings run into problems: Is this because MS allows only one windows live identity to be mapped to your local windows account?)
 - To publish (possible embed in a web page) spreadsheets with Excel Web App, you can choose:
- SkyDrive menu: add files
- add an existing file
- or SkyDrive menu: “new”
- Excel web app ribbon menu: “Open in Excel”
- Copy/Paste your content and Save, Close
- Excel Web app menu “
 Share”/ “Embed”:i
 - Adjust your options in this sharing dialog:

- To embed, take the html-code (you can increase the max width beyond 640 outside of this dialog) and paste it into your web publishing program
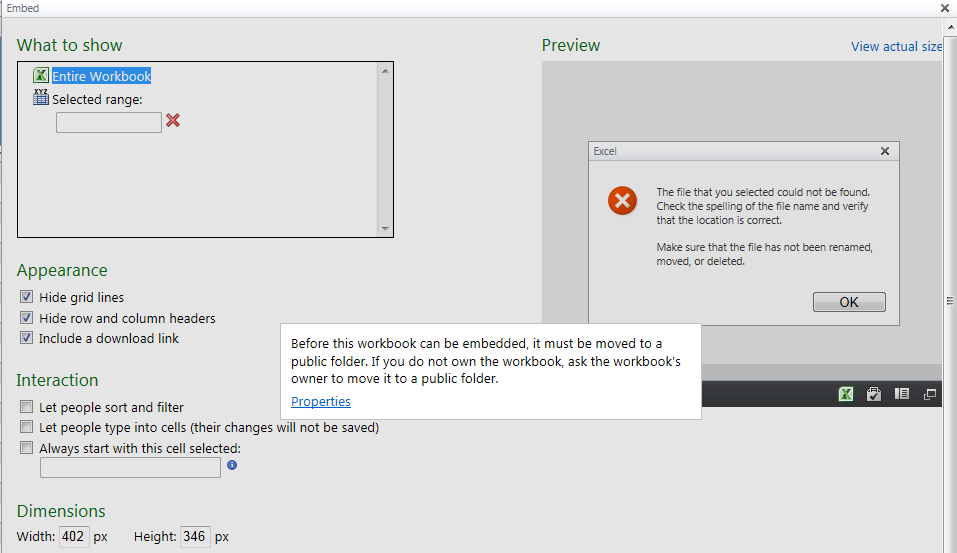
- Gotcha: To be embeddable, the spreadsheet needs to be in a public folder, or else:

- To move the file, use the “move”option in the file details pane to the right:
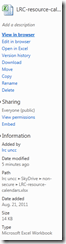
- This setting should make it work:

- And interestingly, it does, automagically: You do not have to update the embed code. It seems the link within the embed code goes to a “file” which has the “folder” it is in not as a path (in the link), but as an attribute:
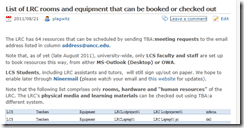
- To move the file, use the “move”option in the file details pane to the right:
- SkyDrive menu: add files
- to share a file: Examples for MS-office live file collaboration
- MS-Excel
- Do not use the “embed” link from SkyDrive, e.g. https://r.office.Microsoft.com/r/rlidExcelEmbed?su=10634757809471938&Fi=SD25C841818181C2!133: this opens in read-only even if I am logged in (in Firefox and in Excel)( as a friend with editing rights)
- use the “edit” link from SkyDrive, e.g https://skydrive.live.com/edit.aspx?cid=0025C841818181C2&resid=25C841818181C2%21133: “edit in browser” attempts first opening in browser (Firefox – not asking for permissions, since I am logged in as friend with editing permissions), unsupported features redirect to excel 2010, opening in “protected view“ – but can enable editing.
- Note that when opening in excel 2010, you lose the concurrency that excel web app offers – thus, only 1 LRC assistant can have the online spreadsheet open to make update to the film collection (we have one barcode scanner equipped PC only anyway, so use this one for editing the film-collection.xlsx)
- MS-PowerPoint
- here is a folder link from where you can click on ""open in PowerPoint":
https://skydrive.live.com/redir.aspx?cid=0025c841818181c2&resid=25C841818181C2!115 - this may take time:
- here is the ""edit in browser"" link https://skydrive.live.com/edit.aspxcid=0025C841818181C2&resid=25C841818181C2%21146
- here is a folder link from where you can click on ""open in PowerPoint":
- MS-Excel
- to delete a file on SkyDrive:
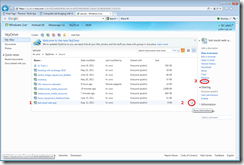
- in detail view, hover over the file row
- click on the blue info button at the right end of the file row
- in the property pane that opens up on the right, click “delete”.
- MS-Word
- Just in case you were wondering about the underlying WEBDAV: You cannot paste the “open in word” link into a MS-Word 2010 file open dialogue (you used to be able to paste WebDAV links form the Blackboard Content System into MS-Word’s File-Open, but those were fully qualified URIs to MS-Word-files without JavaScript trickery), or else:

- As of 9/27/2011, I also now managed to get in to SkyDrive with my university credentials, for how, see here: Skydrive@uncc.edu
- first uncc-LRC needs to make some friends:
- Natural language features testing in MS-Office 2010 is being logged here.








How to disable or rather bypass the Popup Blocker in your Web browser
Try pressing the CTRL-key when clicking a link that tries to open a popup window.
This is a known problem with web-based learning applications like Moodle or library ereserves (like UNCCC’s Docutek ERes-based one) .
You can permanently disable popup blockers for certain sites if you study the documentation that comes with your browser (and possibly with the shared computer) you are working on.
Free screencast recording software from Microsoft
Teachers ask me about software for making screencasts explaining procedures to their students. I have not googled for free screencast recorders recently, since I have been happy for many years to use (or rather work with extensively, and recommend) Windows Media Encoder 9 on MS-Windows. Allegedly as of end of 2010, this software is not linked on Microsoft’s website anymore (but can still be googled and downloaded). Even though not officially supported on this OS any more, I have also used it successfully on Windows 7 (64-bit) (after Vista (64-bit) and Windows XP)).
The official replacement screencast recorder from Microsoft is Windows Expression Encoder (of which I still use the inexpensive Version 3), which is available here (Version 4 SP1) for free. Media Encoder is almost 10 years old, so Expression Encoder is clearly superior – however, the free version is somewhat crippled, most notably in this context I seem to remember the time limit for screencasts is 10 minutes.
Both Encoders are somewhat technical in nature. In particular, I suspect the reason why considerable experts did not know Media Encoder as a screencast recorder (which is not the same as a documentation and training maker: its post-editing capabilities are limited and not specialized for documentation, unlike e.g. Camtasia), was that its default settings for screencast recordings are low quality.
To “uncork” the real possibilities of this software, your first need to alter the compression settings within the WME configuration file that your screencast is based on (you can do this from within Windows Media Encoder itself). Moreover, for this change to stick, you need to alter an underlying PRX template file also. This file is hidden away in the depths of the Encoder install directories; after installing Windows Media Encoder, search your programs folder for a file named schia.prx, it is an XML file that will open with the Windows Media Encoder utilities.
How to enable a secondary monitor, using the Dell Monitor: Front Buttons
If the Monitor is in no-signal mode (indicator: screensaver test image floating across the screen, may be color test or single color like message below) ,

try to press front button: icon “monitor with incoming arrow” AKA the ”input selector” (may be leftmost or the 2nd button from the left), to help the monitor detect the input signal ( setting “Autodetect” should do just this, but seems to fail).

This has been tested to work (turn the monitor on to display a signal received in a dual monitor setup) on the dual monitors connected to both the LRC teacher and reception desk computers.
How to do Call forwarding on the Cisco IP Phone 7912
Press button “CFwdAll“:
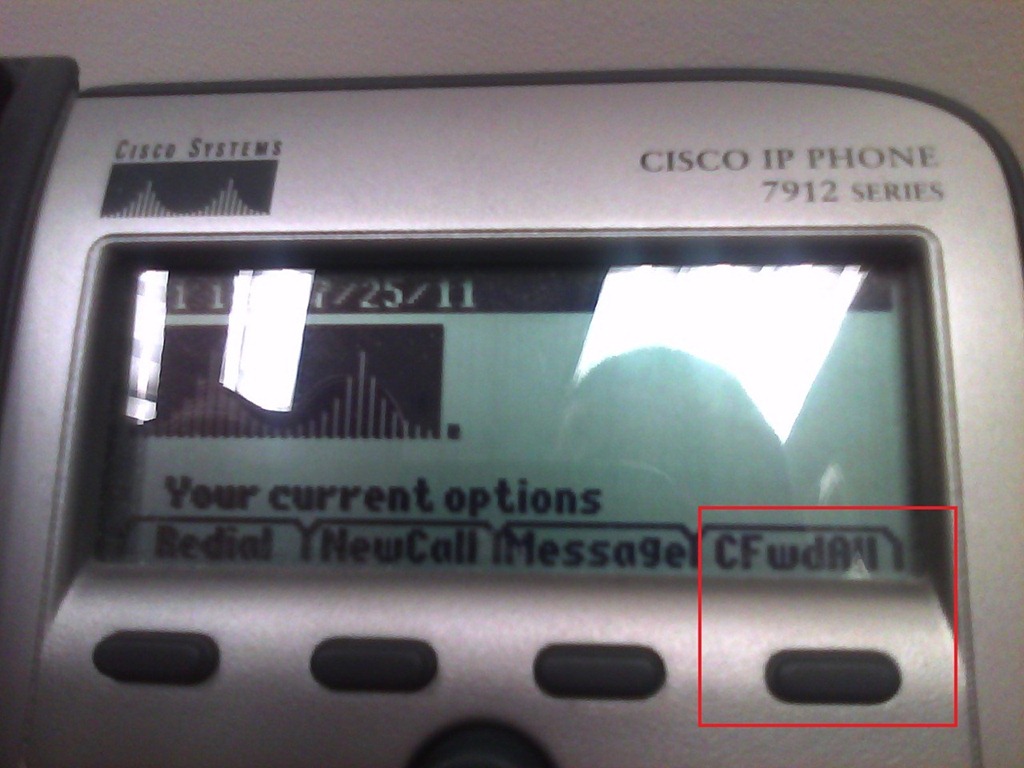
Type the phone number:
 .
.
To un-forward, press button “CFwdAll” again.
How to enable screen cloning and switching between display modes on the LRC reception desk dual screen Dell OptiPlex 780 with WinXP
Short, non-technical answer: on the keyboards of the reception desk computers, press key combination
- ALT+CTRL+F10 to mirror the same image on both monitors;
- ALT+CTRL+F11 to return to extending the primary screen, i.e. showing something different on the second screen.
- if this stops working, restart the computer.
We do not use any more key combination ALT+CTRL+F10 to cycle through the different desktop configurations, which include cloning/mirroring the same image on both screens (also keep pressing the key combination, in order to get back to extending the image to the 2nd screen, for running an informational display (calendar, PowerPoint) to display on the 2nd screen after mirroring the lab assistant’s screen onto the 2nd screen when interacting with a client on the other side of the help desk counter).
Longer, technical answer: You have to configure this. But the Win XP dialogue: Display Properties / tab: Settings only allows for “extending” the desktop to the secondary screen. However, button: Advanced leads to another dialogue, with a tab: ATI Control Center, by the graphics card manufacturer.
If you also enable the advanced settings in this dialogue, you can get to the hotkey settings where, among other things, you can enter a key combination for cycling through Display Configurations, one of which being cloning.

In addition, you can save this configuration as such:

Why all these minutiae? You cannot have LRC clients and staff at the help desk communicate with the help of a computer (and all the goodies accessible now, from intranet to interwebs) if they cannot easily share the screen (and, in order to both even interact with the screen, share keyboard and mouse, which are easy to duplicate, if you have some spare USB input devices lying around). If you can make them share, you have applied AI to business problems (compare dual screen system in the LLC entrance area here). If calling the after state “AI” sounds too lofty to you, you may call the before state “flying blind” instead: I just care about the delta which remains the same.

Questions? Read the About. Or just ask me a quick Our Databases: Resources with calendars -- Language learning material Moodle Sites, multimedia files -- films


FAQs for LRC student staff or for students or for teachers. To search our FAQs, in the browser addressbar, add after "https://plagwitz.wordpress.com/feed/?tag=faqs+/" "+TAG1" (from tag cloud below) OR "https://plagwitz.wordpress.com/feed/tag=faqs
&category_name=" "CAT1" (from category hierarchy below). OR search both categories and tags, and multiple TAGs/CATs (connect with "," for OR-search, with "+" for AND-search), like so: https://plagwitz.wordpress.com/feed/?tag=TAG1+TAG2+...TAGn&category_name=CAT1
+CAT2+...CATn"
Other ways to find help
If you cannot find it here, look there: 5,500 Language-Learning Links and Programs for learning or teaching 150 languages
Shortcuts:Our Lists, Our Maps, LRC Staff Moodle Site,LRC Project Moodle Site, 49erexpress, UNCC Moodle, Student Recordings: s:claslcslrcsanakostudent
Learning usage samples: Sanako oral exam, Kaltura webcam presentation, Dictation with speech recognition, Sanako written exam, Chinese and Japanese interactive stroke-order practice
Test the Sanako Installer, Webbrowser Popup Konfigurator for XP, or Windows7, faster LRC TeacherPC Log-in Let MS facilitate diacritics writing by installing for you US-International keyboard layout
This is my personal blog (Google+). The views expressed on these pages are mine alone and not those of my employer. The information in this weblog is provided “AS IS” with no warranties, and confers no rights.

