Archive
Archive for the ‘audience-is-students’ Category
Checklist for heavy tripods (01-04)
2013/12/23
Leave a comment
- Are all Parts there?
- Tripod
- Head plate
- Screws /wing nuts
- Handle

- Test the Functionality:
- Attach a camera to tripod.
- Move camera in all directions (top/bottom, left/right…)
- Maintenance:
- reduce tripod size again to its most compact position.
- Close all levers so that legs arrest.


Checklist for Rebel cameras (17/18/19/20)
2013/12/23
1 comment
- Parts
- Battery
- SD Memory Card
- Battery Charger
- USB cable
- Lens

- Test the Functionality
- Turn camera on
- Set to video
- Take a 5sec video


- Playback

- Maintenance
- Charge battery
- Initialize sd card like so.


Checklist for microphone booms
2013/12/23
Leave a comment
- Model:

- Parts:

- 3 segments (1,2,3),
- 2 segment connecting screws (4,5)
- 1 top screw (6) allows for attaching part “small”from shotgun mics (but “large” does not fit):


- 1 top screw plastic cap(not pictured)
- Functionality:
- Note that these parts are supposed to be assembled,
- and the plastic rings to be loosened,
- for the boom to extend, like so:


Download for free Arabic diacritizer, romanized to Arabic script converter for Office 2013
2013/12/20
3 comments
- “The Arabic Authoring services help users read and write Arabic faster.
- Maren Reader helps users read Romanized Arabic by converting the Romanized script into Arabic script.
- Diacritizer restores the missing diacritics in the Arabic text, which allows users to write text without diacritics and have the service restore them.”

- These tools should be useful for fledgling learners of Arabic – but don’t solely rely on them, since computers processing human language still make errors.
- These tools were developed by Microsoft Research Labs Cairo, learn more about them.

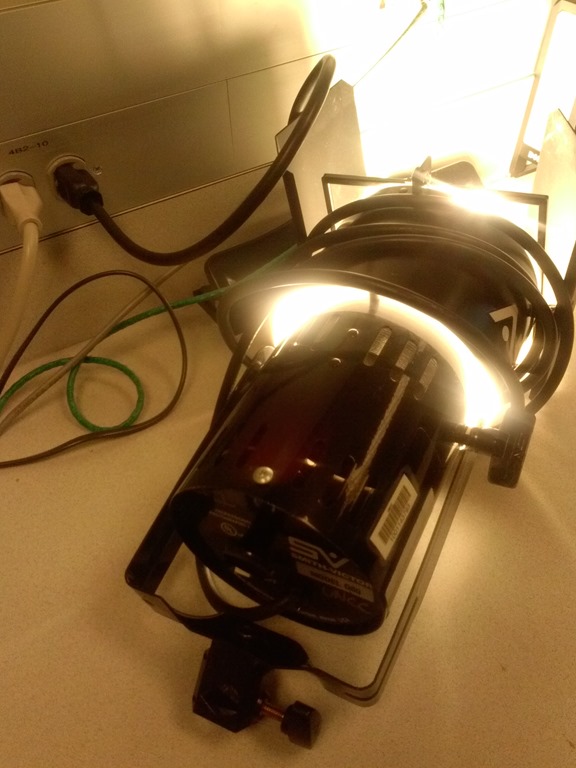
Checklist for light-kits
2013/12/11
Leave a comment
- Parts: 25 each, .i.e.:
- 4 plates (1)
- 2 more plates (2)
- 3 extension power cables (3)
- 3 lamps (4), containing 3 bulbs (not pictured)
- 2 thingamabobs (5)
- 8 clamps (6)
- 2 stands (7)

- Functionality: plug them in and turn them on, like so:


Free German online proofing tool by Duden
2013/12/09
Leave a comment
- Don’t have MS-Word Proofing Tools, and can’t come to the LRC which has proofing tools for German and many other languages installed?
- Try Duden’s (= authoritative German dictionary publisher, and nowadays much more) free (up to 800 characters at a time; a time-limited (=30 days add-in for MS-Word is also available) Online version:

- Use it wisely: Learning is not cheating. But please consult your teacher whether this is legitimate help.
- Now how’s the quality? Drop us a comment below.
Categories: audience-is-students, German, websites, Writing
proofing-tools
How to record screencasts with Kaltura in Moodle 2
2013/11/18
Leave a comment
- Go to your video assignment in Moodle:
 .
. - Click “Record screen”, “Add”, and pass the Java security Dialogues:

- The default video resolution is 640*480, but you can change this by unfolding the drop down menu:

- Full screen is recommended for a Slideshow:

- To start, click the red record button:

- You will get a few seconds to collect your thoughts:

- After finishing your slide show, stop the recording from the taskbar icon, and stop the recording:
 .
. - From the video window that opens:
- You can preview it
![clip_image001[4]](https://thomasplagwitz.com/wp-content/uploads/2013/11/clip_image0014_thumb1.png?w=541&h=373 "clip_image001[4]")
And upload it which includes encoding which takes a bit of time (but not as much as encoding of webcam footage).
![clip_image002[4]](https://thomasplagwitz.com/wp-content/uploads/2013/11/clip_image0024_thumb1.png?w=548&h=385 "clip_image002[4]")

- You can preview it
- Finally,
- you can see the result in your media library

- preview it once more:

- and submit your video content from the media library.
- Kaltura screencasts can be used from any Java-compatible device. In the LRC, however, you can also record screencasts to files, using MS-Community Clips which you can still upload to Kaltura – extra step, though –, while maintaining compatibility with Mahara.


![clip_image001[4]](https://thomasplagwitz.com/wp-content/uploads/2013/11/clip_image00141.png "clip_image001[4]")
![clip_image002[4]](https://thomasplagwitz.com/wp-content/uploads/2013/11/clip_image00241.png "clip_image002[4]")


Categories: assignments, audience-is-students, lms, multimedia-recording, Screencasts
kaltura, moodle


Questions? Read the About. Or just ask me a quick Our Databases: Resources with calendars -- Language learning material Moodle Sites, multimedia files -- films


FAQs for LRC student staff or for students or for teachers. To search our FAQs, in the browser addressbar, add after "https://plagwitz.wordpress.com/feed/?tag=faqs+/" "+TAG1" (from tag cloud below) OR "https://plagwitz.wordpress.com/feed/tag=faqs
&category_name=" "CAT1" (from category hierarchy below). OR search both categories and tags, and multiple TAGs/CATs (connect with "," for OR-search, with "+" for AND-search), like so: https://plagwitz.wordpress.com/feed/?tag=TAG1+TAG2+...TAGn&category_name=CAT1
+CAT2+...CATn"
Other ways to find help
If you cannot find it here, look there: 5,500 Language-Learning Links and Programs for learning or teaching 150 languages
Shortcuts:Our Lists, Our Maps, LRC Staff Moodle Site,LRC Project Moodle Site, 49erexpress, UNCC Moodle, Student Recordings: s:claslcslrcsanakostudent
Learning usage samples: Sanako oral exam, Kaltura webcam presentation, Dictation with speech recognition, Sanako written exam, Chinese and Japanese interactive stroke-order practice
Test the Sanako Installer, Webbrowser Popup Konfigurator for XP, or Windows7, faster LRC TeacherPC Log-in Let MS facilitate diacritics writing by installing for you US-International keyboard layout
This is my personal blog (Google+). The views expressed on these pages are mine alone and not those of my employer. The information in this weblog is provided “AS IS” with no warranties, and confers no rights.
