Archive
How to use your office computer in the classroom
How-to:
- Click
 , click
  , type “mstsc”, click
  .
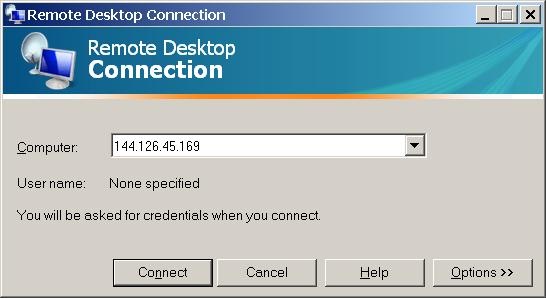
. - In the field of the upcoming window, enter your office computer’s IP number (you have to do this only once, the teacher computer will remember the number).

- This will connect you to your office PC, and if you run mstsc (Microsoft Terminal Services Client) in full-screen, it appears pretty much like working on your office computer.
- To find out your office IP number, on your office pc, Click , click , type “cmd”, click . cmd. On the command line, type “ipconfig”, your “IP address” appears .
- Problems? Tell OTS with a link to this post.
Benefits:
- use your local configuration with which you are most familiar also in class (e.g. US-international keyboard);
- prepare windows for classes in your office at leisure (windows will show in the state you left them in the office), saving class time;
- use the computer in class more, saving class time.
Risks:
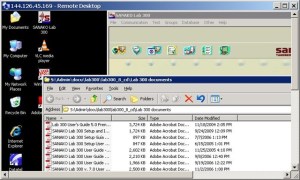
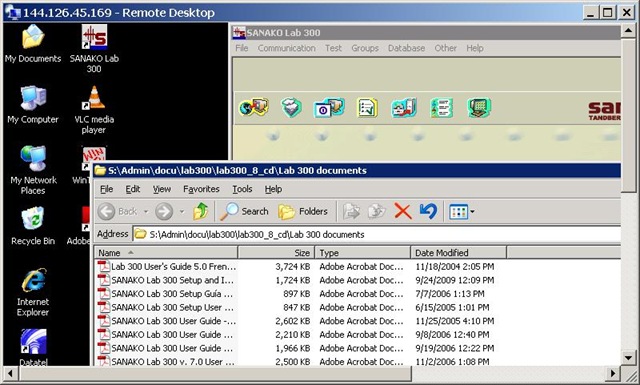
- does not work well with multimedia. Workaround: switch mstsc to window mode and play multimedia from the local desktop of the classroom PC:
- make sure you do not have any windows open in the office which you do not want to display in the classroom
- set your online status to “busy” in Office Communicator and other instant messaging applications, or else others might send disrupting text message pop-ups while you teach
- possible screen size incompatibilities (mstsc can automatically accommodate for differences, within limits)
- always test before going live.
PowerPoint: Can you apply a different Master Slide by “ Copy and paste a slide master from one presentation to another”
I am not too much into form(atting beyond what follows function), so I lifted this straight from the PowerPoint 2007 Help file – is deleting the original master slide a way/the best way to apply the new master slide to all slides? Comments (below) welcome
- “ Open both the presentation that contains the slide master that you want to copy and the presentation that you will paste the slide master to.
- In the presentation that contains the slide master that you want to copy, on the View menu, in the Presentation Views group, click Slide Master.
- In the slide thumbnail (thumbnail: A miniature representation of a picture.) pane, right-click the slide master that you want to copy, and then click Copy. Notes
- In the slide thumbnail pane, the slide master represents the larger slide image, and the associated layouts are positioned beneath it.
- Many presentations contain more than one slide master, so you may have to scroll to find the one that you want.
This list of slide layout thumbnails contains one slide master and two layouts.
- On the View tab, in the Window group, click Switch Windows, and then select the presentation that you want to paste the slide master to.
- In the presentation that you want to paste the slide master to, on the View menu, in the Presentation Views group, click Slide Master.
- In the slide thumbnail pane, to click the location where you want the slide master to reside, do one of the following:
- If the destination presentation contains a blank slide master, right-click the blank slide master, and then click Paste.
- If the destination presentation contains one or more customized slide masters, scroll to the bottom where the last slide layout resides, right-click below it, and then click Paste.
- To copy and paste additional slide masters, follow steps 1 through 6.
- On the Slide Master tab, in the Close group, click Close Master View.” (PowerPoint 2007 Help – press F1).

How to distribute learning materials using the Blackboard Content System
I needed to make a large set of textbook mp3 files accessible to myself in the classroom, as well as to students and myself from dorm/home.
The Blackboard Content System makes this easy, while observing copyright restrictions.
Below is a 6-minute narrated screencast on how to set up and use the Blackboard Content System to easily (work on batches of files on the web, just like on your computer, access from office, classrooms or home office) and securely (allow access only to qualified students) handle multimedia files
The example involves numerous mp3 files from a Textbook Audio CD previously only accessible from the LLC computers)).
This would work as well with your self-created teaching materials, from text handouts to video recordings.
If you need better management (many files, reuse across terms) than the standard course document upload can provide.
See the video file name for a brief table of contents:
If the teaching material item is already in the content collection, to publish it to a new course:
- add a new item to a content area of the course,
- follow the numbered steps 1-4 in this screenshot:

- then click submit twice: first close the content system window with
 , to automatically give your students access to the files:
  , then finish adding



Conference Interpreting Videos on Intranet
On campus, students can click  , click
  , paste “\\lgu.ac.uk\lgu$\multimedia student\mmedia\mmedia1\language_services\teaching_materials\online_resources.xls”, click
  . Click a cell with a hyperlinked video to play the video in Windows Media Player.
In Windows Media Player, you can access (right-click on top window frame if menus are hidden) the menu: “File”/”Save” to save the video on a flash memory drive and take if off campus. You can play back the videos on MS-Windows and MAC computers (you may first have to install the support for the Windows Media Video format on the MAC from Microsoft). More help.
Interpreting Suite: How to avoid audio feedback
- symptom: loud squealing noise over the classroom speakers
- context: left lectern microphone is turned on; Creston / main room /
[Elmo room] camera is chose (e.g. to display the speaker on the projector; may also be chosen for background recording purposes only)
- resolution: Creston / room controls / speaker: up/own, on/off, to turn the classroom speaker volume down or off entirely
- explanation: the Elmo camera works with the sound from the left lectern microphone (not from the right or DIS microphone); if the Elmo camera is room source, its sound is displayed over the classroom speakers; from where it feeds back into the microphone; etc (infinite loop, feedback).
Windows Live FAQ
Thoughts on use of MS-OneNote for Learner Portfolios in Interpreting?
What are aspects of portfolios, according to Wikipedia.org? Portfolios “document education, work samples and skills” “more in-depth than a resume” can. They come in different flavours: “developmental (e.g., working), reflective (e.g., learning), and representational (e.g., showcase)” and can contain “personal information, evaluations, sample work, and awards and acknowledgments”. If they are e-Portfolios, implying online, they can be “updated often” and with ease, and are “assembled and managed by a user” who controls the “varying degrees of audience access”. With this come “problems of exporting data and related interoperability issues” and the pros and cons of portfolios integrated into existing VLEs of educational institutions, who are initially easily available, but may lack in “learner-centered-ness” beyond the institutional affiliation.
In the OneNote ecosystem, there is a lot of student workbooks samples – may be closer to what I mean to be a portfolio, if they would groom it and reflect on their work –, plus a so called “Digital portfolio: Sample digital portfolio of a teacher that contains multiple sets of student work, stored and organized within OneNote. Includes homework, quizzes, tests and projects.”
“If you want to use recordings made in OneNote, be aware that the default recording quality for OneNote is not meant for speech recognition. We use a voice codec and bit rate/sample rate designed to compress spoken word audio as small as can be while still usable by human beings. In OneNote 2007 we increased the settings slightly to make audio search work better, but speech recognition (transcription) requires a much higher level of quality. To set up your future recordings in OneNote to be transcribable, first go to Tools/Options/Audio and Video. Switch the codec to Windows Media Audio 9.1 Professional. ”
8+x computers in the interpreting suite and maybe 8 extra in the language center could get us started. (an configuration of these computers which is different from the it labs configuration may save some money initially, but incurs maintenance cost permanently, which may be somewhat hidden, but is very real. so a site license for OneNote, if the licensing cost is reasonable at all, would probably be preferable. of course we are past the deadline for software image upgrades, i just managed to get the OneNote in the interpreting suite request in before the deadline).
if we want to enable students to work remotely, they need personal licenses. this is not necessarily expensive (ca 40 pounds for a full office 2007 suite from ms directly for students only which i recommend to any student just to get ms-word, much more so if you use more advanced office applications)..
one of the nicest features of ms-OneNote and which, even if i have not had a chance to test, would most likely strongly recommend using, is the following:
we can store these OneNote portfolios as shared files on our intranet so that students can keep editing /adding to them, and Danielle and other staff at the same time, without conflicts or need for copying and keeping files in synch, open for checking and giving feedback.
this seems much more usable than copying and transmitting (email is impossible, Weblearn, sans webdav and learner portfolio feature at least, very inconvenient) large multimedia files.
using this feature requires, however, a network share which the students can write to (which will also be required for the digitization of the interpreting suite, even my personal hack), and, if we want to support students doing this from home, probably VPN access (i do not think the current FTP access to the home drive would help us any with this task).
Digitization of the SAVILLE analogue Conference interpreting recording facility: Booths. Technical instructions
Prerequisites:
The original SAVILLE setup to add (floor and booth) video and enable recording in the DIS 6000 conference interpreting facility. The cabling, switching and interfacing can all be used unchanged, and the VHS recorders should indeed be used as backup. OTOH, once you feel confident about digital recording, you can fade out the VHS recorders (or replace them by yet another output device).
Digital video capture card – the cheapest I could find was this and it tested to work (including lip synching),
Miscellaneous AV splitters and cables.
Windows Media Encoder 9 and the Windows Media Encoder SDK, both available from Microsoft and installed by campus ICT support.
Windows Media Encoder Configuration Files trprecord_a.wme and trprecord_av.wme in \\stushare_server\StuShare\Humanities, Arts and Languages\Language_Services\configuration
AutoIt3, a scripting language used on campus for computer deployment. The compiled executable I provide has no prerequisites on our MS-Windows installation. If you want to make changes in the au3 script, you will need the free AutoIt3 language and development environment.
The script relies on impersonation to access the network shares. If the user/password this impersonation is based on changes, you can still work with the recordings on the local PC. To restore the network archiving/sharing functionality, you have to run trpPwdEncrypt.exe (a slight adaptation from the AutoIT3 help file example) and follow the included instructions:

Then recompile the script trprecord.au3 (both files are stored on the instructors-only share) and put the resulting trprecord.exe on the student-accessible share.
Troubleshooting:
- Check the AV cables and connectors.
- Check the screenshots and their filenames which the software produces for logging in the local temp directory (note that this directory gets purged on restart).
- If you make changes in the environment, do not fail to also change the corresponding configuration strings at the top of trprecord.au3, then recompile.

Questions? Read the About. Or just ask me a quick Our Databases: Resources with calendars -- Language learning material Moodle Sites, multimedia files -- films


FAQs for LRC student staff or for students or for teachers. To search our FAQs, in the browser addressbar, add after "https://plagwitz.wordpress.com/feed/?tag=faqs+/" "+TAG1" (from tag cloud below) OR "https://plagwitz.wordpress.com/feed/tag=faqs
&category_name=" "CAT1" (from category hierarchy below). OR search both categories and tags, and multiple TAGs/CATs (connect with "," for OR-search, with "+" for AND-search), like so: https://plagwitz.wordpress.com/feed/?tag=TAG1+TAG2+...TAGn&category_name=CAT1
+CAT2+...CATn"
Other ways to find help
If you cannot find it here, look there: 5,500 Language-Learning Links and Programs for learning or teaching 150 languages
Shortcuts:Our Lists, Our Maps, LRC Staff Moodle Site,LRC Project Moodle Site, 49erexpress, UNCC Moodle, Student Recordings: s:claslcslrcsanakostudent
Learning usage samples: Sanako oral exam, Kaltura webcam presentation, Dictation with speech recognition, Sanako written exam, Chinese and Japanese interactive stroke-order practice
Test the Sanako Installer, Webbrowser Popup Konfigurator for XP, or Windows7, faster LRC TeacherPC Log-in Let MS facilitate diacritics writing by installing for you US-International keyboard layout
This is my personal blog (Google+). The views expressed on these pages are mine alone and not those of my employer. The information in this weblog is provided “AS IS” with no warranties, and confers no rights.

