Archive
Basics of Windows Search (Windows Vista, probably Windows7) – in German
Ich könnte ohne die verbesserte Windows (als herunterladbares add-on auch für XP) Suche wohl noch leben (vegetieren! :-), aber nicht mehr arbeiten.
In MS-Vista (englisch, das müßt ihr selbst eindeutschen, aber meist gehen die die englischen Abkürzungen auch im deutschen Windows), im “control panel” kann man unter “indexing options” Feinheiten einstellen:

Man kann die Suchoptionen ändern, wenn man die “search tools” aufklappt:
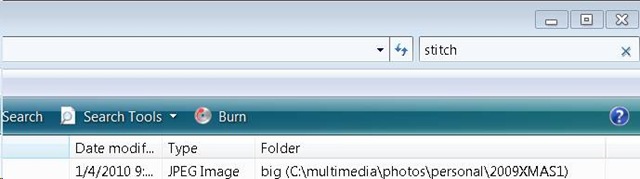
Wehttps://plagwitz.wordpress.com/wp-admin/post.php?post=6&action=editnn man mit windows taste + f eine neue Suche öffnet, hat man auch eine “Aufklappe” für “advanced search”:

Das sieht dann so aus :
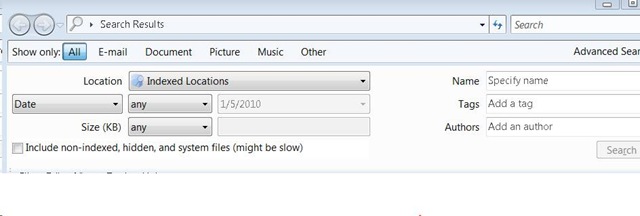
Sobald man zu faul wird, immer das Gui zu benutzen, kann man nach dem öffnen von windows-Taste + f in der Einzel-Suchzeile die “advanced syntax” (in der Hilfe dokumentiert) benutzen.
Die Abkürzungen, die ich am häufigsten benutze, sind ungefähr diese :
file:weihnachtsgeschenke ext:xls folder:myfiles date:>12/24/2009
Canon ZR-200 LLC Camera Basics
The camera can store only about 30 [check, might be 100 or more, recording size is 5MB per 1 min video] minutes on its SD card
Currently we are using my personal SD card, bring your own to extend the recording time (by swapping the cards. You can move video clips onto classroom computers’ network shares if the classroom computer is in MS-Active Directory (which most should be) and if the classroom computer has an SD card reader (which most will NOT have).
Video–clips (internal access only) showing how to operate the camera are here:
camera-canon-zr200-Inserting&Removing_Memory_Card_Starting&Stopping&Filming.avi
camera-canon-zr200-Inserting_Memory_Card_into_Card_Reader_on_Assistant-Computer.AVI
camera-canon-zr200-moving_video_from_memory_card_to_H-Drive.avi
For base documentation, see these graphics:


You can change the audio modes:


Optimum video mode with card is 320*240.
All in all: Quick and dirty recording and archiving for basic assessments…

Create a PowerPoint slide with a timer from template for a timed audio recording exercise
If you require an audio recording exercise, where you allot to students a longer period of time for a free-form response, possibly to a visual cue, here is a demo screencast, based on the teacher.pot powerpoint template collection: powerpoint-timer-slide.wmv.
Blackboard: Discussion board: Unread posts
- The Blackboard discussion board is designed for busy people keeping track of large constituencies – some classes have 1 instructor, 100s of participants and discussion board assignments….
- One of the most useful features is when you enter the discussion board, there is a shortcut to the “Unread Posts”, like marked here:
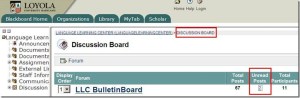
- If you click on this number of unread posts, you are taken to an overview page (sorted counter-chronologically be default; not threaded, but you have plenty of other display and management options), which you can skim for new developments, as well as use to manage your posts:

- Examine the top menu for options. You can either for individual posts click “mark as read”, as you read each one. Or you can use the “select all” tool and the “mark all as read” button in the top menu to clean up your board. Once you leave, your discussion board home page should look like this:


Sanako Lab 300: Pairing and some basics
In the spirit of ‘Better improvised instruction and information distribution than failing classes in the lab”, I recorded a 1-on-1 instruction on how to pair students, including some other basic Lab300 features into a 5-minute screencast with voice over (open with Windows Media Player): sanako-lab300_pairing-and-basics.wmv
For an overview, see the following table of contents (when reviewing the video before starting your class in the Lab, search your webmail for the link to this instruction.)
- Not shown: teach students once and for all: always log in first;
- Grouping setup pane (all into L, then into A, excluding unused seats);
- Pair discussion setup pane (button: select for manual pair select mode);
- Not shown: teacher should use button: duo launch to facilitate student control of audio;
- Within group A pane , teacher uses button:transfer, changes program source to audio cassette:
Pair discussion setup pane : “re-pair”, using button:cancel all, button:random to have Lab 300 software choose pairs; - Within group A pane , teacher uses button:headphone for talking to group (not shown: remember to undo when finished!)
- From classroom layout: teachers clicks student icon to bring up student pane;
- From student pane, teacher views student screen, listens to student (or pair), uses student button:intercom for talking to student (or pair);
- From top menu: Other / thumbnail view of group: teacher brings up Mosaic window, to monitor (“police”) entire group screens; translates what you see to individual student, and uses button:lock (keyboard, screen or both) to prevent students from not staying on task [Demo this in first lab class to your students, using the screen projector , and hopefully they will hopefully stay on task];
- From menu: Other/ thumbnail view of group, teacher brings up Mosaic window and double clicks student screen to control individual student computer (e.g. to close a web browser – another way to police, less effective, but possible; better used for collaboration) . [Better policing options can be set up in the using the Lab300 web browser).
How Teachers grade Student recordings from the Sanako Lab 300
-
Teacher on their office PC (MAC users talk to OTS at loyola.edu) can press
 windows-key+e, and in the window, that opens,
 -
browse to the student mp3 recordings in the “studentcollect” folder or in “their” folder on S:\[put teacher name here] (no S: drive on office PC? read the “Shortcuts” section on http://plagwitz1.spaces.live.com, right hand side, under my portrait),
-
open the student recording file, either by doubleclicking to, presumably, open it in Windows Media Player, or, preferably, by selecting multiple files, right-clicking and chosing “Open with” to open them for comparative grading in Audacity).

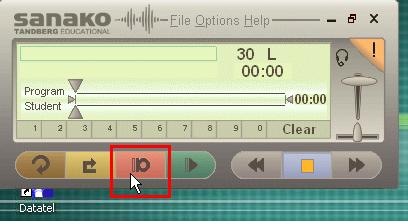
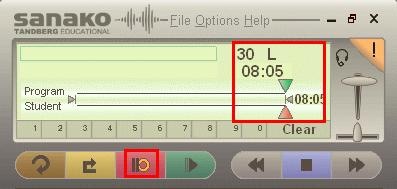
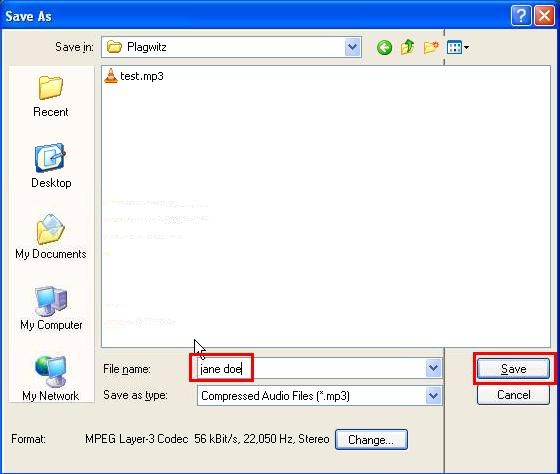
How students make audio recordings using Sanako Lab300 Media Assistant







Questions? Read the About. Or just ask me a quick Our Databases: Resources with calendars -- Language learning material Moodle Sites, multimedia files -- films


FAQs for LRC student staff or for students or for teachers. To search our FAQs, in the browser addressbar, add after "https://plagwitz.wordpress.com/feed/?tag=faqs+/" "+TAG1" (from tag cloud below) OR "https://plagwitz.wordpress.com/feed/tag=faqs
&category_name=" "CAT1" (from category hierarchy below). OR search both categories and tags, and multiple TAGs/CATs (connect with "," for OR-search, with "+" for AND-search), like so: https://plagwitz.wordpress.com/feed/?tag=TAG1+TAG2+...TAGn&category_name=CAT1
+CAT2+...CATn"
Other ways to find help
If you cannot find it here, look there: 5,500 Language-Learning Links and Programs for learning or teaching 150 languages
Shortcuts:Our Lists, Our Maps, LRC Staff Moodle Site,LRC Project Moodle Site, 49erexpress, UNCC Moodle, Student Recordings: s:claslcslrcsanakostudent
Learning usage samples: Sanako oral exam, Kaltura webcam presentation, Dictation with speech recognition, Sanako written exam, Chinese and Japanese interactive stroke-order practice
Test the Sanako Installer, Webbrowser Popup Konfigurator for XP, or Windows7, faster LRC TeacherPC Log-in Let MS facilitate diacritics writing by installing for you US-International keyboard layout
This is my personal blog (Google+). The views expressed on these pages are mine alone and not those of my employer. The information in this weblog is provided “AS IS” with no warranties, and confers no rights.

