Archive
MS-Office Communicator: Getting Started
https://thomasplagwitz.com/2009/11/13/collaboration-using-ms-office-and-network-shares/Click  , click
  , type “communicator”, click
  .
.
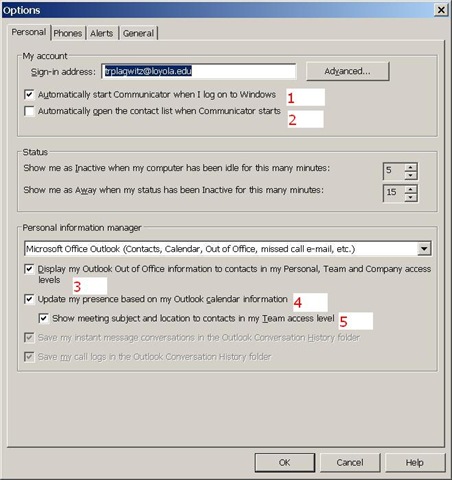
To adjust options, click (1), (2) and (3) here:

To start communicator with Windows, select (1).
To have Outlook automatically show you as busy during calendar appointments (e.g. your classes), select (4).
To get your contact list up to speed, select all the contacts in the to-address line of a mass email and drag them to your communicator window, see this screencast here: communicator-email-contact-drag.wmv.
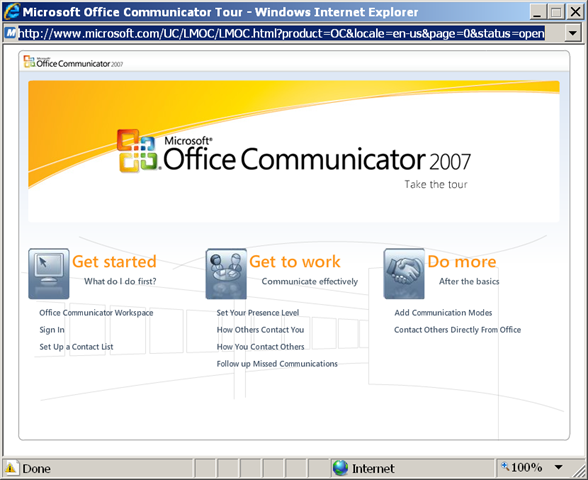
Microsoft has a useful “Getting Started” web-based training here:
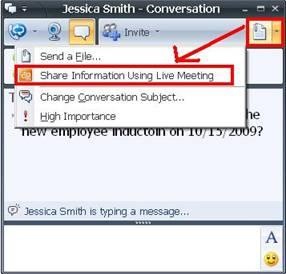
To use the advanced features of Live Meeting, you can either use the context menu of the contact, or within an existing messaging session, escalate to Live Meeting by using the upper right hand corner menu, like in these 2 screnshots:

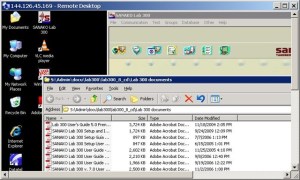
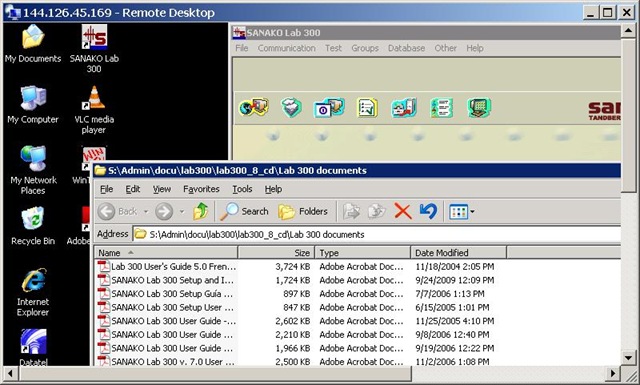
How to use your office computer in the classroom
How-to:
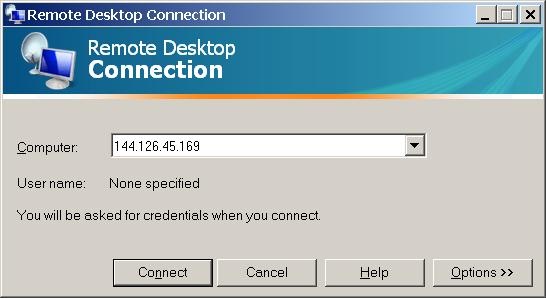
- Click , click , type “mstsc”, click .
- In the field of the upcoming window, enter your office computer’s IP number (you have to do this only once, the teacher computer will remember the number).

- This will connect you to your office PC, and if you run mstsc (Microsoft Terminal Services Client) in full-screen, it appears pretty much like working on your office computer.
- To find out your office IP number, on your office pc, Click , click , type “cmd”, click . cmd. On the command line, type “ipconfig”, your “IP address” appears .
- Problems? Tell OTS with a link to this post.
Benefits:
- use your local configuration with which you are most familiar also in class (e.g. US-international keyboard);
- prepare windows for classes in your office at leisure (windows will show in the state you left them in the office), saving class time;
- use the computer in class more, saving class time.
Risks:
- does not work well with multimedia. Workaround: switch mstsc to window mode and play multimedia from the local desktop of the classroom PC:
- make sure you do not have any windows open in the office which you do not want to display in the classroom
- set your online status to “busy” in Office Communicator and other instant messaging applications, or else others might send disrupting text message pop-ups while you teach
- possible screen size incompatibilities (mstsc can automatically accommodate for differences, within limits)
- always test before going live.
How to distribute learning materials using the Blackboard Content System
I needed to make a large set of textbook mp3 files accessible to myself in the classroom, as well as to students and myself from dorm/home.
The Blackboard Content System makes this easy, while observing copyright restrictions.
Below is a 6-minute narrated screencast on how to set up and use the Blackboard Content System to easily (work on batches of files on the web, just like on your computer, access from office, classrooms or home office) and securely (allow access only to qualified students) handle multimedia files
The example involves numerous mp3 files from a Textbook Audio CD previously only accessible from the LLC computers)).
This would work as well with your self-created teaching materials, from text handouts to video recordings.
If you need better management (many files, reuse across terms) than the standard course document upload can provide.
See the video file name for a brief table of contents:
If the teaching material item is already in the content collection, to publish it to a new course:
- add a new item to a content area of the course,
- follow the numbered steps 1-4 in this screenshot:

- then click submit twice: first close the content system window with
 , to automatically give your students access to the files:
  , then finish adding


Digitization of the SAVILLE analogue Conference interpreting recording facility: Lecture/Floor recording and CCTV streaming
The original conference interpreting lab setup had no provision for digital video recording of the lecture/floor. A workaround used on of the booth VCRs for analogue recording, with video form an ELMO dome cameras and audio from a lectern microphone – an audio installation which ran in parallel to the main DSI conference interpreting facility (and covered only the lectern, not the conference table).
A home-brew add-on was based on a consumer handheld digital camera for video. Experiments with different add-on microphones for audio from the lectern and floor were less than successful.
The DIS system however provides an audio out of the lectern an/or floor audio, as well as the capability for the conference administrator to open or mute floor microphones and for the technical administrator to set the maximum number of open microphones, and control their gain.
For the digitization of this system, I used
- an already retired standard university student lab computer
- to which I added an old spare ATI All-in-Wonder video card
- to which I connected a TEVION home TV switch as a poor man’s (~5£) video splitter into which I fed
- the (hitherto unused) DIS audio out balanced stereo, using an RCA adapter, as well as
- the ELMO video, using a coax to RCA adapter (video signal was split into the ATI as well as back into the original SAVILLE Kramer AV switch).
While originally coming with its own digitization software, the ATI All-in-wonder also works well with Windows Media Encoder.
Two wme configuration files were created:
- capturetestaticomposite_pal-l_480x320works.wme(find this file on the computer connected to the central rack, then double-click it in order to start Windows Media Encoder, then click the Record button in the top menu – no custom GUI was deemed necessary for this non-student operated recording) for recording to files that can be played with Windows media player, whether on Windows or on Mac OS X.
- streamtest480x320_15fps_pal.wme (again, simply find this file on the central rack computer, then double-click it) for streaming CCTV live to the back office. An onsite admin office was one of the usual features of a teaching lab which was missing in this installation. CCTV allows to keep an eye on teaching activities in the conference interpreting lab, proactively spot support needs ands absorb feature requirements which instructors tend to have problems articulating (or even seeing the need for articulating). A (lower quality archived stream is created on the side and can be picked up, post-processed and archived at TBA).


Language Learning Center Forms
Here you can download some forms which we use in our business processes.
Lab Assistant/Supervisor Job Application Form
Unless specified otherwise, submit to trplagwitz at Loyola.edu.


Questions? Read the About. Or just ask me a quick Our Databases: Resources with calendars -- Language learning material Moodle Sites, multimedia files -- films


FAQs for LRC student staff or for students or for teachers. To search our FAQs, in the browser addressbar, add after "https://plagwitz.wordpress.com/feed/?tag=faqs+/" "+TAG1" (from tag cloud below) OR "https://plagwitz.wordpress.com/feed/tag=faqs
&category_name=" "CAT1" (from category hierarchy below). OR search both categories and tags, and multiple TAGs/CATs (connect with "," for OR-search, with "+" for AND-search), like so: https://plagwitz.wordpress.com/feed/?tag=TAG1+TAG2+...TAGn&category_name=CAT1
+CAT2+...CATn"
Other ways to find help
If you cannot find it here, look there: 5,500 Language-Learning Links and Programs for learning or teaching 150 languages
Shortcuts:Our Lists, Our Maps, LRC Staff Moodle Site,LRC Project Moodle Site, 49erexpress, UNCC Moodle, Student Recordings: s:claslcslrcsanakostudent
Learning usage samples: Sanako oral exam, Kaltura webcam presentation, Dictation with speech recognition, Sanako written exam, Chinese and Japanese interactive stroke-order practice
Test the Sanako Installer, Webbrowser Popup Konfigurator for XP, or Windows7, faster LRC TeacherPC Log-in Let MS facilitate diacritics writing by installing for you US-International keyboard layout
This is my personal blog (Google+). The views expressed on these pages are mine alone and not those of my employer. The information in this weblog is provided “AS IS” with no warranties, and confers no rights.
