Archive
Archive for the ‘Speaking’ Category
Bad audio quality in Moodle Kaltura recordings on iMacs under ambient sound conditions. A running log (closed)
2014/08/22
Leave a comment
- Symptom: See title.
- Cause: While speakers of the 3.5 mm headset take over from the iMac speakers, when plugged in, the 3.5 mm headset micro does not disable the webcam micro. The webcam micro remains the recording source for Moodle Kaltura (mac os x.6, safari 6, flash 10).
- Possible solutions:
1st choice: is there a way for the admin to override this permanently?2nd choice: is there a way for the end user to override this on a case-by-case basis?- "The Califone 3066AV is compatible with both Windows and Mac audio outputs (but is not compatible with iMacs)." ("The Wow starts now!").. Do we have to tie up our boom and lavalier microphones for this?
- Try the flash settings by right clicking in the video window, selecting the microphone icon, then choosing the external (= non-webcam) microphone for input.


- Fail. The real culprit is the iMacs line-in audio-in for which you need a preamp to get it to work with analog microphones. Preamps seem to start at $40, but for that I can get a PC webcam (Microphone included).


Interpreting against audio files sources with live feedback in Sanako Study 1200
2014/04/25
Leave a comment
- How will we be recording
- Individual recording
- Voice insert: student control how much time they have interpreting
- students can stop the source where they want, they can rewind and review the source, they can overwrite their initial interpretation, they can interpret at the speed they want.
- We could insert cues at sentence ends in the source; and also (but little need,) slow the source down or insert pauses
- Student track
- students have to follow along at the speed of the source can stop the source where they want, they can rewind and review the source; they can with some difficulty overwrite their initial interpretation/
- More difficult: We likely should slow the source down or insert pauses
- Voice insert: student control how much time they have interpreting
- Model imitation: like an exam,
- students all speak in parallel, without individual control
- Most difficult: We most likely need to slow the source audio down, including inserting pauses as "breathers")
- Individual recording
- What audio track will we be collecting?
- If student saves manually, student can save either or both tracks , but need to be taught.
- If model imitation, we collect only student recording.
- If lock player/collect buffer, we collect both source and student track
- Listener can focus on one track by controlling the balance during playback: https://thomasplagwitz.com/2014/03/31/how-to-manage-balance-on-stereo-audio-using-audacity-sanako-student-recorder-or-any-audio-player-on-windows/
- Listener can also split the audio tracks (= delete the source track),
- more easily (file / save as) in the sanako recorder
- More
- Teacher listening in
- Is always possible,
- just click the student icon in the classroom layout
- or use screen control / autoscan: the audio switches with the screen, this has a bit of overhead, and our computers are network are not the fastest, but we made some changes to optimize speed; best reserved for when you also need to see the student’s screen.
- Is always possible,
- Teacher speaking: Teacher providing on-the-fly feedback via "Discuss":
- Playlist Launch and open (goo.gl/2awRG/): then you can stop each individual student (students do not work in sync, remote-controlled) .
- Model imitation (goo.gl/ZL7DG/) : then you cannot talk to one (all students record in sync).
- Teacher providing non-live feedback :
- Teacher can provide aural feedback later when grading the student submissions from your office pc:
- How a teacher can use Sanako voice insert to easily add spoken comments to students’ Sanako oral proficiency exams- step–by step
- We recorded here how it is being done for Business Spanish: Protected: How a teacher can give students aural feedback on oral exams using the Sanako Study 1200 Lite Recorder
- For that voice-insert, you need to install the Sanako Recorder on your office PC.
- Teacher can provide aural feedback later when grading the student submissions from your office pc:
Categories: audience-is-teachers, digital-audio-lab, Interpreting, Speaking
sanako-study-1200
Slowing source audio for interpreting classes in the digital audio lab
2014/04/25
Leave a comment
- To judge from listening to Simult. Lesson 1, text 2 on Acebo Interpreter’s Edge (ISBN 1880594323), I am wondering whether some of our students (= personalization) would need this audio to be simplified, to gain the benefit of a well-adjusted i+1? I can pre-process the audio :
- Where the flatlines = natural pauses are in above graph, insert a audio signal as where students can press voice insert recording, Example:

- We can also insert a pause and a cue at the beginning and end to set students a limit how long they can interpret, but if students operate the player manually, there is no teacher control and no exam condition, and the students having to manage the technology tends to distract from the language practice.
- Slow down the audio without changing the pitch (just have to make sure not to overdo it, else will sound like drunken speech – my time stretching software would be able to avoid “drunken speech” syndrome, but I have not been able to work on it since briefly for IALLT in Summer 2011 for 3 years now…)
- We can use this adjusted with the Sanako grouping feature to personalize instruction (find the right i+1 for each of your student, useful if there are considerable variations in their proficiency): How to group students into sessions (in 3 different ways) goo.gl/JgXUP/.
- Where the flatlines = natural pauses are in above graph, insert a audio signal as where students can press voice insert recording, Example:


Protected: Elti0162 Syllabus with learning materials for listening and speaking
2014/04/07
Enter your password to view comments.
Categories: English, Listening, service-is-learning-materials-creation, Speaking, Spreadsheets
elti0162
Watch how to start and activate speech recognition from the desktop
2014/04/04
Leave a comment
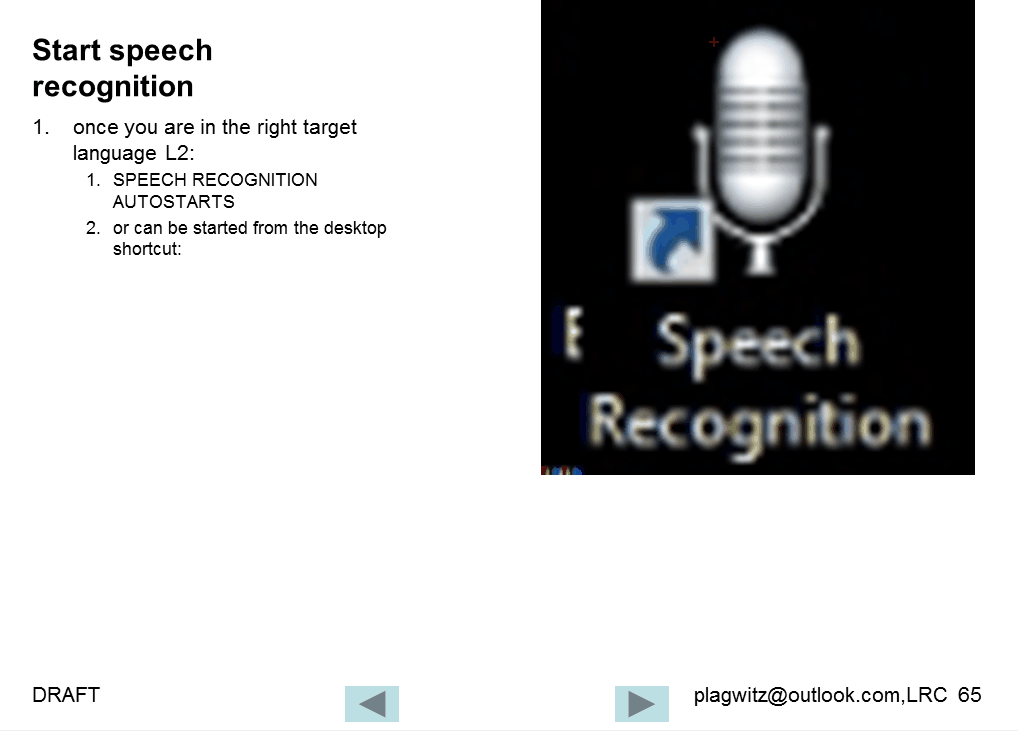
Categories: animated-GIFs, audience-is-students, Speaking
speech-recognition
Watch how to configure the speech recognition wizard on Windows 7
2014/04/04
Leave a comment
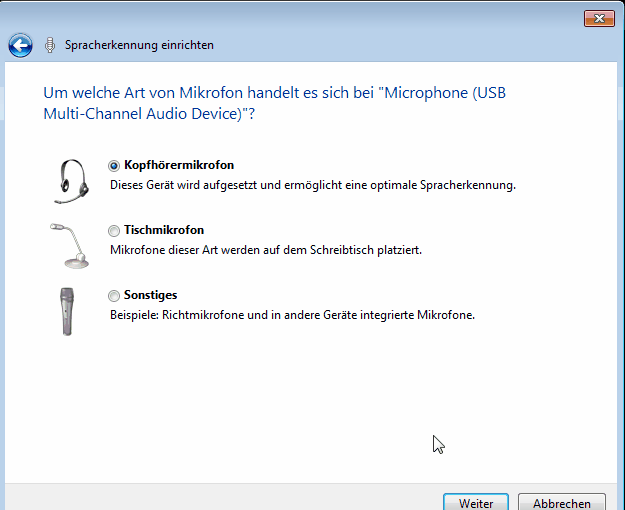
Choose the same options in your language (every time you log in, until we find a way to set these options on a per-machine level).
Categories: animated-GIFs, audience-is-students, Speaking
image2014spring, speech-recognition
How students can manage sidetone manually
2014/03/08
Leave a comment
Sidetone echoes your voice from the microphone back into your headphone speakers. It makes wearing the headphones feel more natural, and lets you evaluate your pronunication better.
Until it is configured properly out of the box, to enable it, you have to:
Open sound settings: 
Check and Increase the sidetone volume until you can hear yourself talking well: 
Categories: audience-is-students, digital-audio-lab, e-languages, Speaking
sanako-study-1200, sidetone


Questions? Read the About. Or just ask me a quick Our Databases: Resources with calendars -- Language learning material Moodle Sites, multimedia files -- films


FAQs for LRC student staff or for students or for teachers. To search our FAQs, in the browser addressbar, add after "https://plagwitz.wordpress.com/feed/?tag=faqs+/" "+TAG1" (from tag cloud below) OR "https://plagwitz.wordpress.com/feed/tag=faqs
&category_name=" "CAT1" (from category hierarchy below). OR search both categories and tags, and multiple TAGs/CATs (connect with "," for OR-search, with "+" for AND-search), like so: https://plagwitz.wordpress.com/feed/?tag=TAG1+TAG2+...TAGn&category_name=CAT1
+CAT2+...CATn"
Other ways to find help
If you cannot find it here, look there: 5,500 Language-Learning Links and Programs for learning or teaching 150 languages
Shortcuts:Our Lists, Our Maps, LRC Staff Moodle Site,LRC Project Moodle Site, 49erexpress, UNCC Moodle, Student Recordings: s:claslcslrcsanakostudent
Learning usage samples: Sanako oral exam, Kaltura webcam presentation, Dictation with speech recognition, Sanako written exam, Chinese and Japanese interactive stroke-order practice
Test the Sanako Installer, Webbrowser Popup Konfigurator for XP, or Windows7, faster LRC TeacherPC Log-in Let MS facilitate diacritics writing by installing for you US-International keyboard layout
This is my personal blog (Google+). The views expressed on these pages are mine alone and not those of my employer. The information in this weblog is provided “AS IS” with no warranties, and confers no rights.
