Archive
How to prevent accidental deletion of files
Hard drives tend to fail occasionally. We recommend working with the institution-provided personal network shares which are regularly backed up by IT.
However, backups can only ever be run so often (normally overnight), and if you create a file during the day and accidentally delete it, there is no Windows Recycle Bin like functionality for network shares.
I am not making recommendations, especially not to bypass institutionally provided services, but I have worked with these additional (free and MS-backed) tools to extend these services:
1. Microsoft Synctoy 2.1: You can create folder pairs (between local and network drives and portable drives). You can have these folder pairs synchronized on the click of a button. This implies that this is not tool does not completely automate synchronization, but you could e.g. do this every morning and evening when you start/stop working. You will have to wait for the synchronization to finish. You could work on the local drive during the day – being able to benefit form the existence of the Recucle bin – and synchronize with your personal network drive at night.
2. Microsoft Live Mesh Beta: You can sign up with a Windows Live ID and designate a folder on your (multiple) PC(s) to be synchronized via a web folder. This happens automatically. Space is limited (5GB?).
3. There are also some settings in MS-Word you may want to consider, which you can access by clicking the Office button / Word options / Advanced:
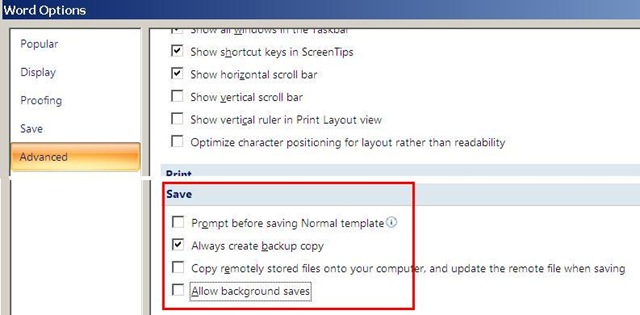
I always have a backup file created on save (in the same folder) and do not allow background saves which helps against file corruptions. I have not tested working with the option of keeping local copies of network share files.
Be aware that you are on your own with this, and that your mileage may vary.
Blackboard: Rolling over courses between terms
In your old course, go to CONTROL PANEL > COURSE COPY”.
Choose: “Copy Course Materials into an Existing Course” (assuming your new course shell has been created for you by your IT admin).
Click button:“Browse” and in the opening window, choose your existing current course, by the term identifier:
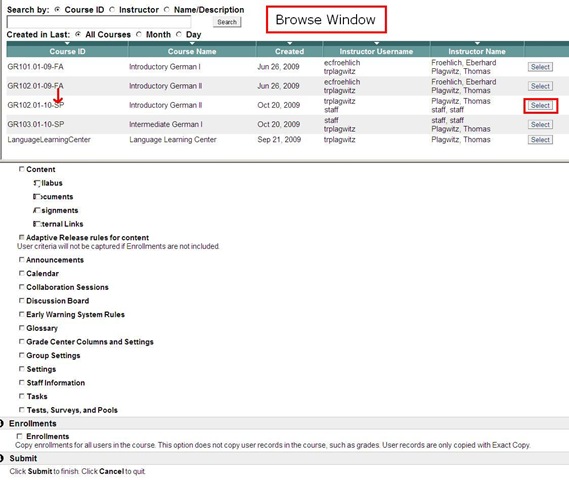
Check all items you want to copy. What is safest to avoid errors? Everything, except enrollments?
Click “Submit”/“OK” until done.
The course copy operation will be queued up, and you will be notified when the operation is finished.
Then go to your new course. This operation also copied the content items, including the content management system items.

Sanako Lab300 Oral-exam-question-response-recording-cycle
A 6-minute screen-cast explaining the sanako-lab300-oral-exam-question-response-recording-cycle.wmv
Please consult the transcript for a table of contents:
|
0,00 |
Here we are administering an oral exam. we are going to play pre-recorded teacher-questions to multiple students, we are going to record their responses and, at the end, we are going to collect their recordings in a batch: |
|
0,12 |
for this, we have all seats where a student is present added to group a, and have set the program source for group a to media file |
|
0,22 |
we monitor the situation on the student computers by accessing menu: other / thumbnail of group, |
|
the screen sharing is slow here, has been improved somewhat by installing more memory, the crowded screen situation has also been improved by installing a secondary monitor, use it for viewing the thumbnail window |
|
|
0,59 |
in the group a pane, we use the button: duo launch, and ok the dialogue, to open th estudent recorder on the student computers |
|
1,07 |
in the section:media source, button: file open, we access our pre-recorded question file |
|
1,13 |
in the meantime, the duo has launched on the student computers – as you can see in the classroom layout from the squares on the student seats, as well as on the mosaic thumbnail screens |
|
1,35 |
we double-click on a single thumbnail to demo to the students on the screen projector how to adjust the volume |
|
1,43 |
we click button:transfer to play the volume test file to the students |
|
we have the students record their name at the end of the sound test, to check all recorders, and to be able to identify the speaker in the actual exam file (which will be saved with only the student number in lab 300) |
|
|
we stop the button:transfer and go to menu:test:response recording |
|
|
in the pane:”response recording”, in section:”collect”, we click button:”start” |
|
|
we save the recording in a subdirectory with a meaningful name of our choice |
|
|
we ok the dialogue that informs us of the response recording |
|
|
in the window:mosaic, the encoding activity window briefly flashes on the student screens |
|
|
we browse to the student collect folder, where all subdirectories are saved |
|
|
we check the folder visibly for the right number (use select all), size or duration of audio files – |
|
|
it would be even safer, even though more time consuming, to open all the test recordings with audacity, especially on a slow computer, and check the volume graph – open audacity and drag and drop all files onto it |
|
|
4,07 |
the soundtest is a complete recording cycle. Simply repeat for the actual exam, but |
|
first close the pane:response recording, to go back to your pane:group, |
|
|
in section:program transfer, click button:group control, click icon:file/new, to flush the prior test out of the student recorders, |
|
|
in the dialogue:”save changes”, click no |
|
|
and this time load the actual exam audio file |
|
|
once the sound check is done, we could use button:lock for the students to prevent them from interfering with the computers during the exam |
View the departmental calendar with your Outlook calendar
If you are looking for a more convenient way to coordinate your personal calendar (and in the future: –s) with the departmental calendar, you can do what is called “Connect to Outlook” a Sharepoint Teamsite Calendar.
Go to “Inside Loyola”, go to your Modern Languages & Literatures team site, 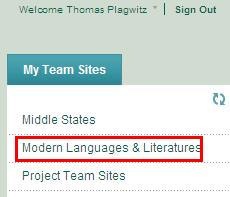
click in the left menu: “Calendar”, click from the calendar top menu: “Actions”/ “Connect to Outlook”, like here:

Click “Yes”here: 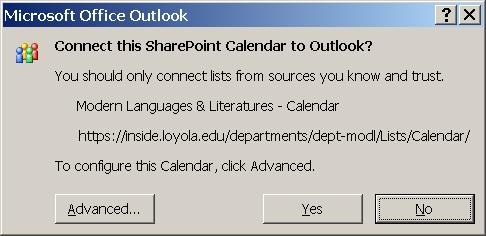 , or “Advanced”,
But there is not much to configure here: 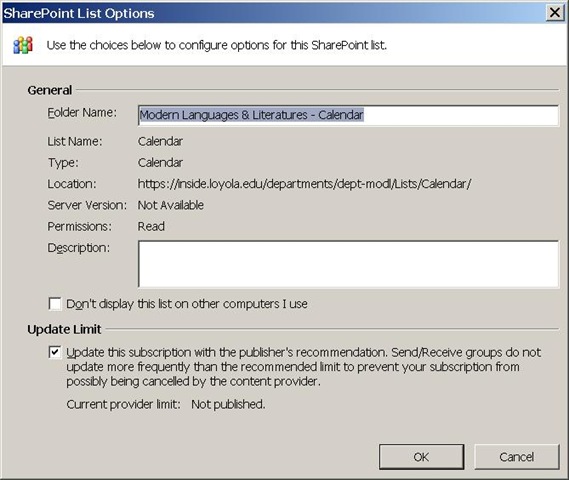
In the resulting view (in “Overlay mode”, like 2 overlaid transparencies), events are much easier to coordinate: like so:
Incidentally: If, after “Connect to Outlook” a Sharepoint Teamsite Calendar, this password dialogue keeps popping up, like so: 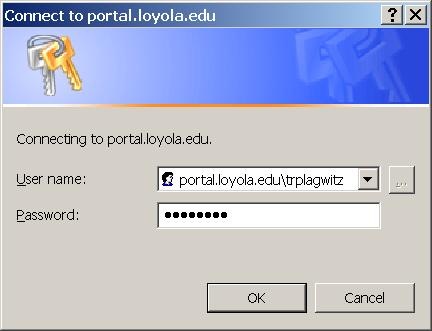 , instead of [your usual username], put [your usual username]@loyola.edu, plus remove the prefix “portal.loyola.edu/”.
Canon ZR-200 LLC Camera Basics
The camera can store only about 30 [check, might be 100 or more, recording size is 5MB per 1 min video] minutes on its SD card
Currently we are using my personal SD card, bring your own to extend the recording time (by swapping the cards. You can move video clips onto classroom computers’ network shares if the classroom computer is in MS-Active Directory (which most should be) and if the classroom computer has an SD card reader (which most will NOT have).
Video–clips (internal access only) showing how to operate the camera are here:
camera-canon-zr200-Inserting&Removing_Memory_Card_Starting&Stopping&Filming.avi
camera-canon-zr200-Inserting_Memory_Card_into_Card_Reader_on_Assistant-Computer.AVI
camera-canon-zr200-moving_video_from_memory_card_to_H-Drive.avi
For base documentation, see these graphics:


You can change the audio modes:


Optimum video mode with card is 320*240.
All in all: Quick and dirty recording and archiving for basic assessments…

Create a PowerPoint slide with a timer from template for a timed audio recording exercise
If you require an audio recording exercise, where you allot to students a longer period of time for a free-form response, possibly to a visual cue, here is a demo screencast, based on the teacher.pot powerpoint template collection: powerpoint-timer-slide.wmv.
Quia Audio Files in Internet Explorer
Quia.com contains “Play audio” links to mp3 audio.

You may experience this, when you first try to access the audio with Internet Explorer.

If you cannot read the instruction in the information bar, resize the window so that you can, like here:

After clicking “trust Microsoft” and “Run ActiveX” in the following dialog, the “Internet Explorer cannot display this webpage” may appear. Ignore this, close the window and reopen it by clicking again on the “Play” link in the parent window.
This time you will (hopefully) see this:

You need to do this only once – per PC? per user? Let me know in the comments.


Questions? Read the About. Or just ask me a quick Our Databases: Resources with calendars -- Language learning material Moodle Sites, multimedia files -- films


FAQs for LRC student staff or for students or for teachers. To search our FAQs, in the browser addressbar, add after "https://plagwitz.wordpress.com/feed/?tag=faqs+/" "+TAG1" (from tag cloud below) OR "https://plagwitz.wordpress.com/feed/tag=faqs
&category_name=" "CAT1" (from category hierarchy below). OR search both categories and tags, and multiple TAGs/CATs (connect with "," for OR-search, with "+" for AND-search), like so: https://plagwitz.wordpress.com/feed/?tag=TAG1+TAG2+...TAGn&category_name=CAT1
+CAT2+...CATn"
Other ways to find help
If you cannot find it here, look there: 5,500 Language-Learning Links and Programs for learning or teaching 150 languages
Shortcuts:Our Lists, Our Maps, LRC Staff Moodle Site,LRC Project Moodle Site, 49erexpress, UNCC Moodle, Student Recordings: s:claslcslrcsanakostudent
Learning usage samples: Sanako oral exam, Kaltura webcam presentation, Dictation with speech recognition, Sanako written exam, Chinese and Japanese interactive stroke-order practice
Test the Sanako Installer, Webbrowser Popup Konfigurator for XP, or Windows7, faster LRC TeacherPC Log-in Let MS facilitate diacritics writing by installing for you US-International keyboard layout
This is my personal blog (Google+). The views expressed on these pages are mine alone and not those of my employer. The information in this weblog is provided “AS IS” with no warranties, and confers no rights.
