Archive
Archive for the ‘Area-is-any’ Category
LRC training animated-gifs
2013/03/18
Leave a comment
- This link gives you a nice overview list of the LRC animated gif’s for training.
- Chrome users need to install this first, still can view get only a subset.
- Neither Chrome nor Firefox offer a search-within like Internet Explorer.
- They are meant for display on the left lrc teacher station screen.
- whether you display them as student training material on the projector
- or display them as guidance for yourself
- Did you miss something?
- The animated gif’s cycle in an infinite loop. Just wait for the next round.
- If you want to restart the video now, press F5 or click the Refresh button
 in your browser address bar.
 - Or use one of the slower speed videos I made.
- I also made clickable versions that you can hand-browse (more control. More effort also).
How to prevent squealing noise on the brown headphones AKA audio feedback
2013/03/13
Leave a comment
- Symptom:high-pitched squealing sound, usually when logged into the computers along the wall (listening stations –other computers have different black headsets which are not as prone to this problem,) and not wearing the headset.
- Short answer: LRC Assistants will let the student who causes the squealing noise know:
- ”Turn the volume knob on the brown headset down!”
- “You can turn it back up once you have put the headset on”.
- Explanation:
- The brown (analog) headsets on the listening stations exhibit this squealing noise when
- the students do not wear the headset
- AND the microphone is too close to the headphone speakers
- AND the headphone volumne knob is turned up to high.
- This phenomenon is called an (audio) feedback loop:
- The headphone speakers echo what is spoken into the microphone (this is called sidetone).
- This is an important language learning feature (helps you control your pronunciation).
- However, it spirals out of control when students do not wear the headset. They also need to “wear the headset!” (general recommendation in the language lab) to have the benefit of the sidetone (and then their head insulates between speakers and microphones).
- The brown (analog) headsets on the listening stations exhibit this squealing noise when
How a teacher can adapt a Sanako teacher-controlled class recording activity for individual student recordings
2013/03/12
Leave a comment
- Pedagogical need:
- A teacher wants her students to record a presentation,
- but allow the students to move around freely in their recording afterwards, when evaluating it, and submit the best out of 3 tries:
- Technical implementation:
- Using Sanako activity:model imitation of differing for multiple groups
- offers maximum control, least flexibility: students have to speak their presentation linearly
- if you anticipate presentations of considerably different lengths
- first try asking your students – might be useful to them anyway to realize if theirs turns out to be much shorter than others,
- if students are unsure about the length of their presentation,
- conduct the first recording with the entire class and
- have students note what time their recorder time counter is at when they finish, and send you the time as text via the button:envelope
- group your students (grouping step-by-step) into Sessions A-F by incrementing time according to what the student icon bubble shows
- then differentiate class into as many groups as necessary (if <= the 6 “sessions”A-F Sanako Study 1200 offers) end the recording at a different time for each group
- for each group (one or more up to 6),
- choose from dropdown activity: model imitation recording
- and from dropdown: source: none) with more than one group at a time,
- and (optionally) for not more than one group at a time (suggest choosing the biggest group for that) from (dropdown: source: file ) the background noise to play
- and after each group’s allocated time (+ buffer) is up,
- press button:end to end the recording
- after collection of the recordings from students is finished, you can
- press button:replay
 , to let each student listen to her recording (linearly, without control), and
 - press button:free
 , to let students freely move back and forth on the timeline)
 - eventually, press button: clear, to be ready:
- choose from dropdown activity: model imitation recording
- for tries 2 and 3: repeat above steps.
- using Sanako activity: self access:
- provides
- the teacher some control (none over this turning into more of an editing than coherent language practice exercise),
- and students more flexibility (hence requiring prior recording training for students);
- students individually
- record
- move around freely in the file
- replay
- record over prior footage and/or start completely over (menu: File / new)
- press button:envelope to text message the teacher that they are finished and want their (final ) recording to be collected by the teacher
- teacher
- moves signaling students into a group (grouping step-by-step) that is
- dedicated for collecting recordings (TBA:does this not empty their buffer?)
- and button:pc control: locked (= no further or accidental changes)
- once an appropriate (compromise between finished students wanting to leave and teacher not having to collect each recording individually) number of students have been added to this group, presses
- button: end to collect and
- button: clear session to clear the button
- assesses the recordings in the folder that opens with audacity;
- in case of problems, moves students back to the group dedicated to recording
- else lets students leave
- moves signaling students into a group (grouping step-by-step) that is
- provides
Categories: Arabic, assessments, audience-is-teachers, digital-audio-lab, e-languages, English, Farsi, French, German, Greek (modern), Hebrew, Hindi, Italian, Japanese, Korean, Mandarin, multimedia-recording, Polish, Portuguese, Presenter-Computer, Russian, service-is-assessing, Spanish, Speaking, step-by-step-guides, Student-Computers, Swahili, Yoruba
oral-exams, sanako-study-1200
How a teacher can organize a student-controlled high-stakes assessment recording session using the Sanako in the LRC
2013/03/12
Leave a comment
- How:
- An initial central microphone and speaker test (animated step-by-step) is recommended. Clear the session afterwards.
- Recording: Have the student operate the Sanako recorder to individually record (like during a self-access assignment)
- For starters, teacher can display this narrated individual recordings with the Sanako Student Recorder training screencast, it auto-starts and auto-cycles):
- And/or explain:
- Red Record Button to record;
- Blue Stop button to stop recording
- Green Play Button to play their assignment for review (also use the recap button to jump back)
- Menu: “File / New”, if they want to redo the assignment.
- Button: call/envelope to call the teacher on the teacher station for help (an audio connection between student and teacher should pause the recorder automatically)
- Submitting:
- Individually by students:
- Menu “File” / “Save” (opt to save as student track mp3), to save locally, once student is happy to submit.
- (recommended:) upload the save file to a Moodle single-file upload assignment. Requires the teacher to create a Moodle Single file upload assignment, with optional attached file first.
- From the Sanako tutor at the teacher station:
- For entire class (If you do not need the flexibility to have students end at different times). TBA
- Group-wise (varying (staggered) recording times): TBA
- Individually by students:
- Pro’s:
- Less distraction from language learning by having to operate technology (editing audio rather then practicing L2) and more language-learning-specific features (sidetone, recap) than if using Audacity.
- Works with the Sanako Study 1200 teacher stations (e.g. automatic pause of recorder when remote connecting to student during monitoring of recording task).
- Con’s:
- noise interference with dozens of student speaking in a confined space simultaneously. Nobody wants to return to the language lab station of yore, i.e. in a cubicle. However, a teacher-controlled oral exam (sample video, step-by-step video),
- can play a soothing background sound to students over the headphones which insulates them from their neighbors (prevents both distraction and cheating);
- there is no room for distracting unrelated chit-chat;
- there is no need for distracting conversation when students do technical troubleshooting, during highly structured question/response exams.
- More user flexibility/control is achieved by more individual distracting operation of computer technology, which always implies more opportunity for user error. To reduce (not eliminate!) the error ratio:
- Students
- have to have received the general digital audio lab introduction for students.
- have to double-check their recordings for quality before submitting.
- Teachers
- have to monitor students’ recording progress closely
- which the Sanako Study 1200 teacher station (link cannot replace hands-on training) greatly facilitates (provided Students use the Sanako Student Recorder, as described above).
- however, even with a classroom management system like Sanako Study 1200, it is impossible to completely monitor a class size of students operating computers. Therefore teachers
- have to check the validity of submissions before students leave.
- If you use submission through Moodle, here are 2 tips how to do this quicker:
- Whether you use submission through Moodle or collection through Sanako tutor:
- view end of this video for how to quickly check validity of all file submissions in a folder using Audacity
- are advised to have a make-up assessment plan not only for those students missing the exam, but also for those that miss to complete the computerized multimedia assessment correctly.
- have to monitor students’ recording progress closely
- Students
- noise interference with dozens of student speaking in a confined space simultaneously. Nobody wants to return to the language lab station of yore, i.e. in a cubicle. However, a teacher-controlled oral exam (sample video, step-by-step video),
How a teacher can show a model student screen to other student computers in Sanako Study 1200–the ultimate training summary…
2013/02/18
Leave a comment

Protected: How you can speed up log-in on the LRC teacher computer at the beginning of your class
2013/02/05
Enter your password to view comments.
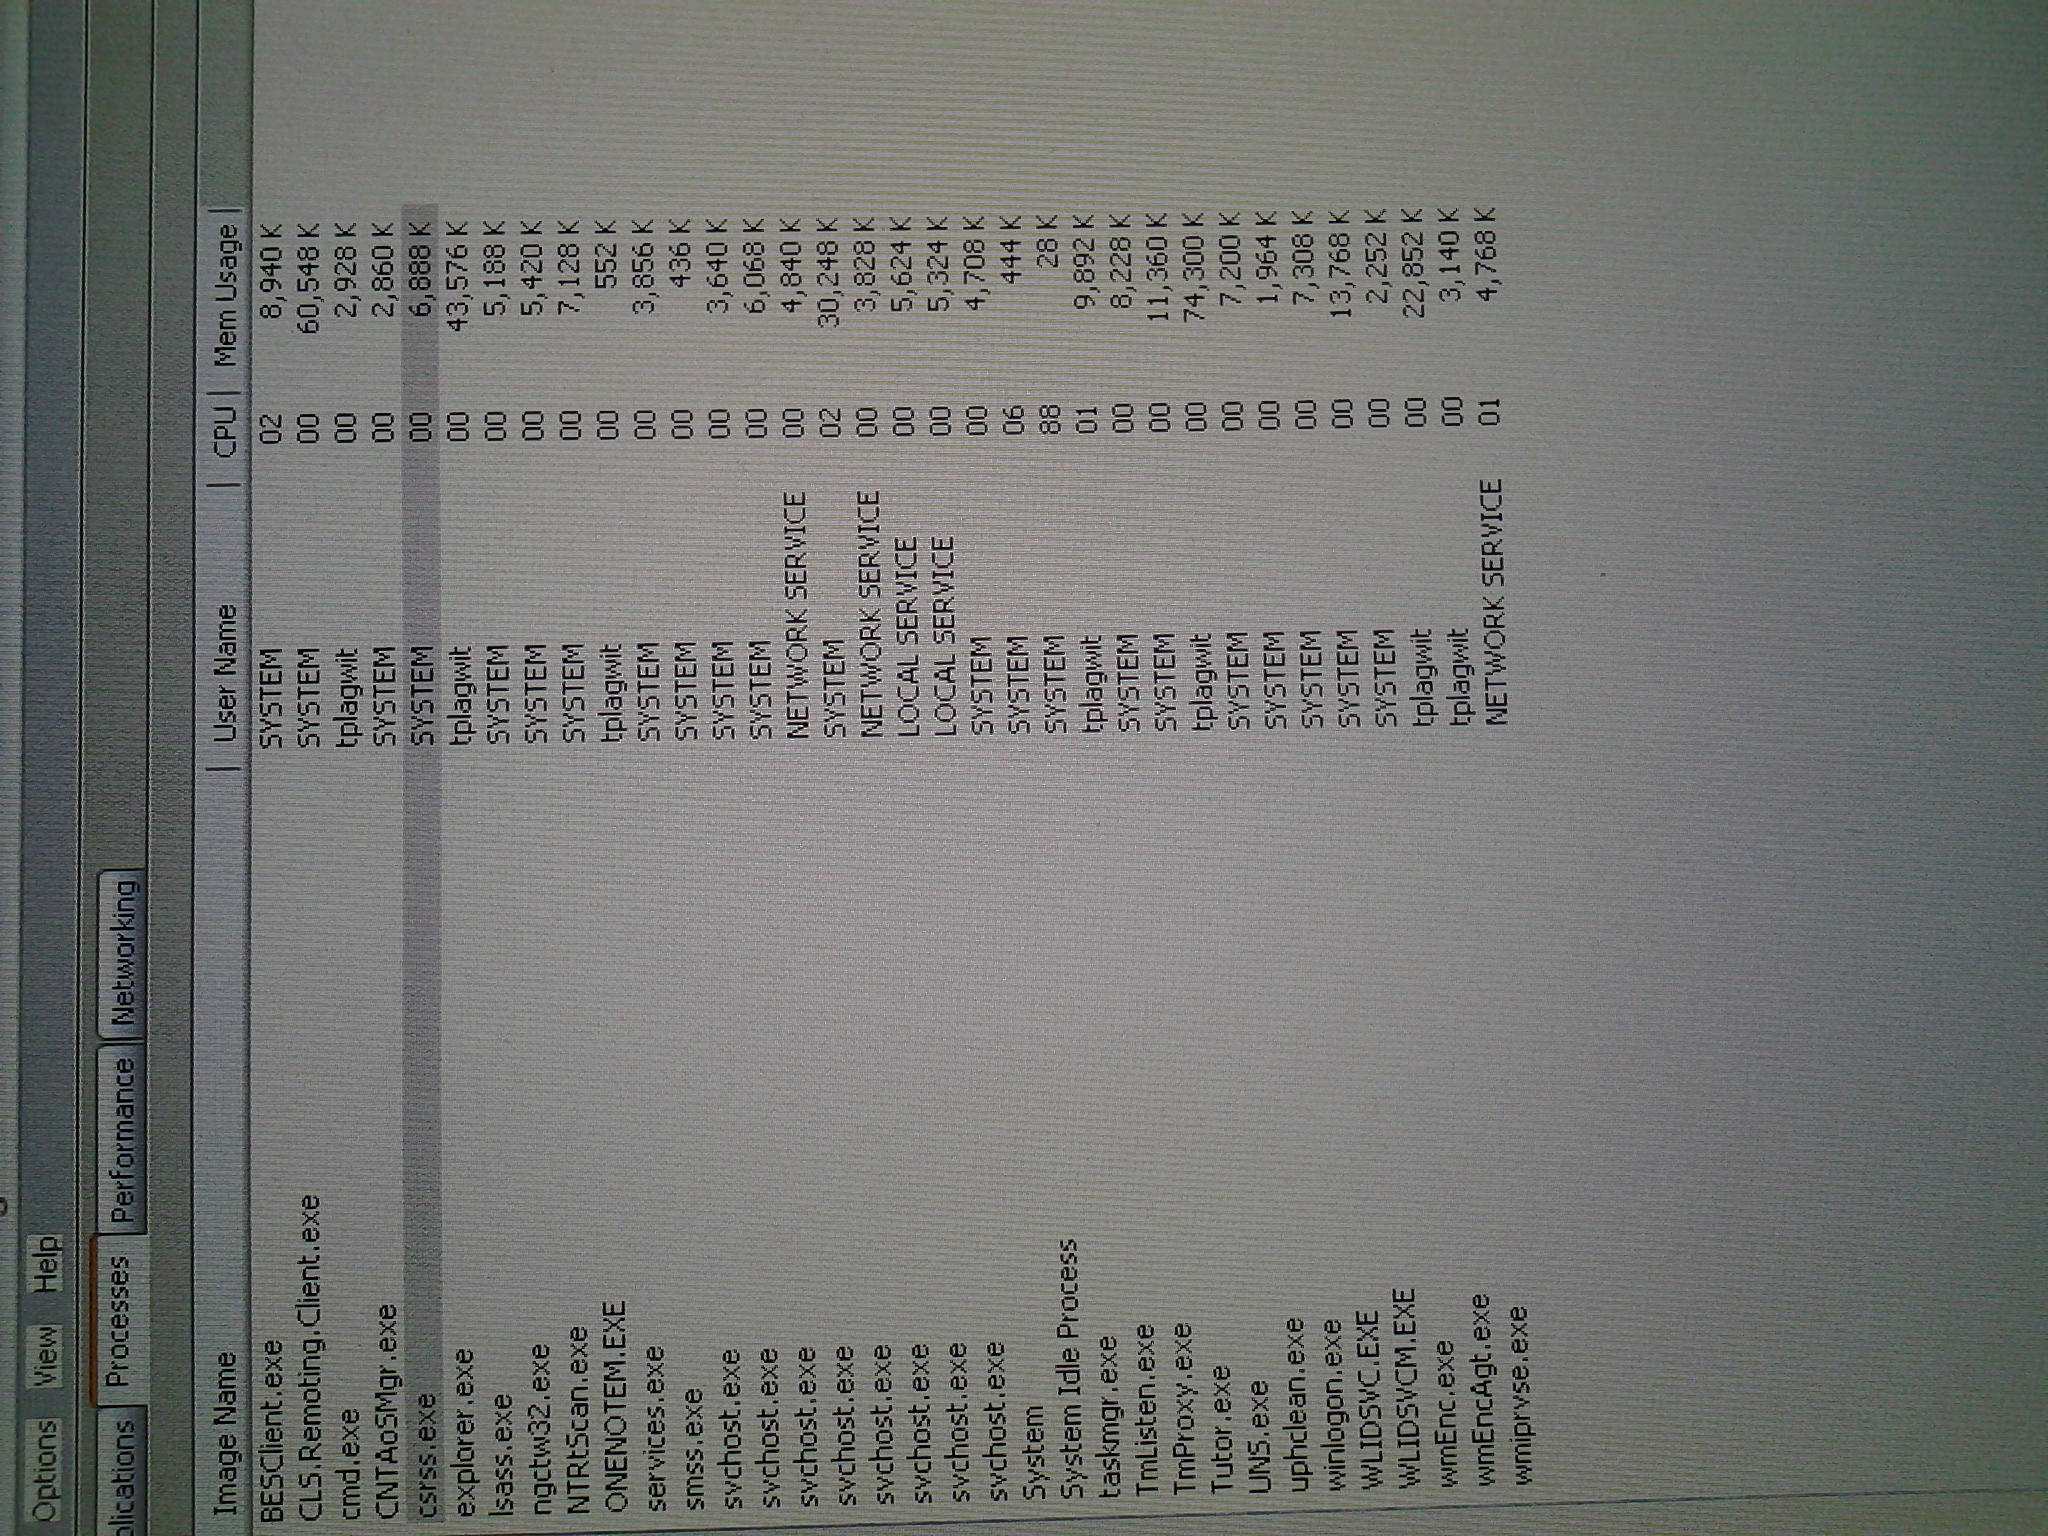
The process normally between ccrss.exe and explorer.exe prevents shutdown…
2013/02/05
2 comments
… and log-off on the teacher station. not always, but often?
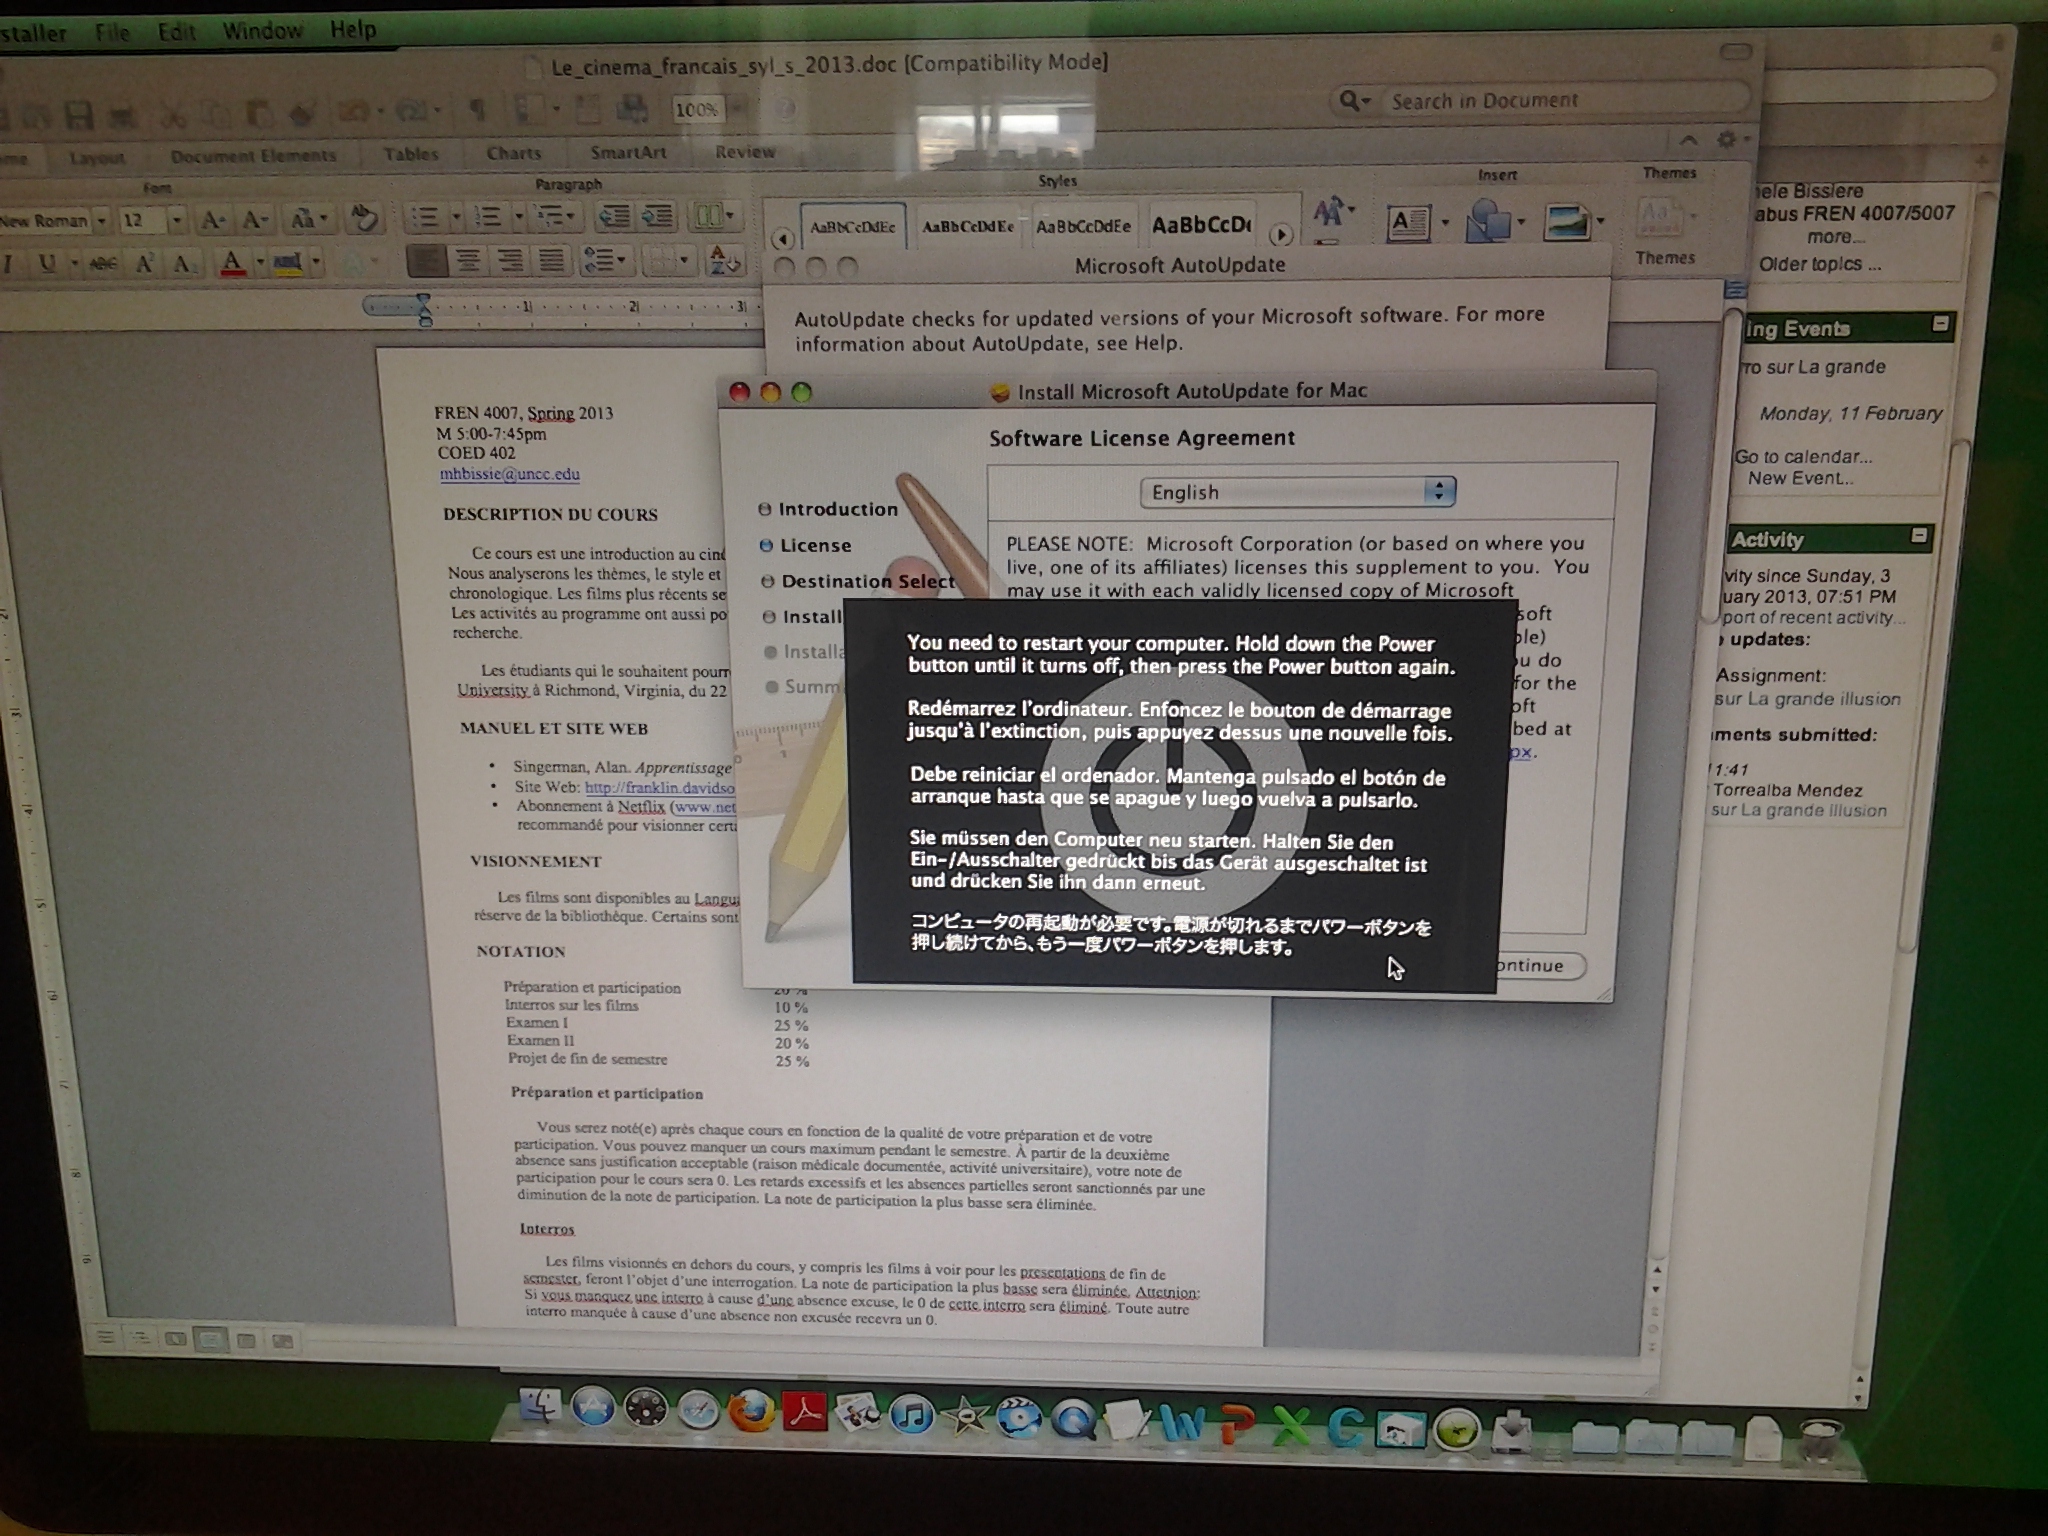
Why is Mac OS X forcing power cycle?
2013/02/05
Leave a comment
Categories: e-infrastructure, iMacs
mac


Questions? Read the About. Or just ask me a quick Our Databases: Resources with calendars -- Language learning material Moodle Sites, multimedia files -- films


FAQs for LRC student staff or for students or for teachers. To search our FAQs, in the browser addressbar, add after "https://plagwitz.wordpress.com/feed/?tag=faqs+/" "+TAG1" (from tag cloud below) OR "https://plagwitz.wordpress.com/feed/tag=faqs
&category_name=" "CAT1" (from category hierarchy below). OR search both categories and tags, and multiple TAGs/CATs (connect with "," for OR-search, with "+" for AND-search), like so: https://plagwitz.wordpress.com/feed/?tag=TAG1+TAG2+...TAGn&category_name=CAT1
+CAT2+...CATn"
Other ways to find help
If you cannot find it here, look there: 5,500 Language-Learning Links and Programs for learning or teaching 150 languages
Shortcuts:Our Lists, Our Maps, LRC Staff Moodle Site,LRC Project Moodle Site, 49erexpress, UNCC Moodle, Student Recordings: s:claslcslrcsanakostudent
Learning usage samples: Sanako oral exam, Kaltura webcam presentation, Dictation with speech recognition, Sanako written exam, Chinese and Japanese interactive stroke-order practice
Test the Sanako Installer, Webbrowser Popup Konfigurator for XP, or Windows7, faster LRC TeacherPC Log-in Let MS facilitate diacritics writing by installing for you US-International keyboard layout
This is my personal blog (Google+). The views expressed on these pages are mine alone and not those of my employer. The information in this weblog is provided “AS IS” with no warranties, and confers no rights.
