Archive
Posts Tagged ‘moodle’
How to record screencasts with Kaltura in Moodle 2
2013/11/18
Leave a comment
- Go to your video assignment in Moodle:
 .
. - Click “Record screen”, “Add”, and pass the Java security Dialogues:

- The default video resolution is 640*480, but you can change this by unfolding the drop down menu:

- Full screen is recommended for a Slideshow:

- To start, click the red record button:

- You will get a few seconds to collect your thoughts:

- After finishing your slide show, stop the recording from the taskbar icon, and stop the recording:
 .
. - From the video window that opens:
- Finally,
- you can see the result in your media library

- preview it once more:
- and submit your video content from the media library.
- Kaltura screencasts can be used from any Java-compatible device. In the LRC, however, you can also record screencasts to files, using MS-Community Clips which you can still upload to Kaltura – extra step, though –, while maintaining compatibility with Mahara.
Categories: assignments, audience-is-students, lms, multimedia-recording, Screencasts
kaltura, moodle
How a student submits prior content from “My content” into a Moodle Kaltura video assignment
2013/11/18
Leave a comment
- Go to your video assignment in Moodle:
 .
. - Click “Add media submission”:

- Jump through the hoops:

- switch to “my content”
- you have to click the “search” button to show content, leave search filed empty to show all
- note that there may be more
- you have to select a video
- before that, you cannot click next
- confirm on the next screen

- You are done when you see this:
 , but hey, better press “continue” to be safe:
 - On the next screen, you can review:


- Not so clear how you get out of there…
- Troubleshooting: If you run into problems, the first thing to try usually is a different web browser.
Categories: audience-is-students, e-languages, lms
kaltura, moodle, my-content
How to create screencasts of student presentations for the language learner ePortfolio in the digital audio lab
2013/11/08
Leave a comment
- Students can now easily video-record their own screens during class presentations – not only when using PowerPoint; instead students could demo a website, like their Facebook page.
- Last year, we were limited to PowerPoint’s record slideshow with timing and narration feature, and either send the PPSX (small, but requires the PowerPoint viewer) or the “Save as” video (new in PowerPoint 2010; computing intensive and large file size).
- Now with MS-Community Clips, screencasts are
- minimal effort to create (keyboard shortcut WIN+ALT+R or T; save on desktop; drag/drop into Sanako homework folder)
- and little effort to distribute:
- Students could have uploaded to a Moodle’ file upload assignment (default file size limit: 64MB) or Kaltura file upload assignment (not sure whether there is a size limit). This seems more suitable for assignments with screencasts recordings.
- In this instance
- Sanako collected the Homework files to the Sanako share,
- my langlabemailer emailed them as attachment (so far tested to allow for 25MB attachment size, the equivalent of 7-8 minute screencast, a hefty space to fill in L2! We also established: 45MB is too much…
 ) to the originating student and teacher, for review, grading –
- and – provided it passes muster as an attractive and significant piece – possibly for re-use in the student’s language learner ePortfolio.
- In addition,
- Before the presentations, the teacher easily collaborated on proof-reading the slide decks of individual students, by using the Sanako Remote control screen sharing feature.
- During the presentation, students followed more closely – which seemed to increase their attention and comprehension -, thanks to audio and screen being shared to them from the presenter, using the Sanako’s “Model student” feature.
Categories: Arabic, audience-is-teachers, digital-audio-lab, e-languages, English, eportfolio, Farsi, French, German, Greek (modern), Hindi, Italian, Japanese, learning-usage-samples, Mandarin, multimedia-recording, office-software, Portuguese, presentations, Presenter-Computer, Russian, Spanish, Speaking, Student-Computers
file-upload, homework-activity, kaltura, langlabemailer, model-student, moodle, ms-community-clips, ms-powerpoint, sanako-study-1200, screensharing, videos
How to provide students with blended human/computer-automated feedback on their speaking using a dictation with speech recognition assignment screencast
2013/05/08
Leave a comment
- Teachers often feel there is never enough time for grading students’ speaking proficiency. Fortunately, we can now automate feedback on pronunciation using Windows 7 dictation with speech recognition.
- This feature will be available for 7 languages on Windows 7 in the LRC, here is a demo for a reading exercise dictating German.
- An assignment step-by-step could look like this: Students
- record a screencast of their dictation,
- read a text to the computer in MS-Word,
- turn track changes on in MS-Word and correct the text (immediately or after dictation) where the computer could not recognize their speech,
- upload their screencast to Kaltura in Moodle.
- To grade the performance, the teacher has to review only at the very end of the screencast to see how many corrections the student needed to make (when it doubtabout the speech recognition validiiy, the teacher can easily jump to the screencast segment in question and, if necessary, override the speech recognition).
- This could be a regular assignment type since it provides the following benefits:
- immediate automated intelligent feedback for the student
- little grading overhead for the teacher, so that the teacher can concentrate her work on providing aural feedback on student recorded speech as a highlight maybe twice per term, maybe after mock exams before a midterm and final exam
- some multimedia pieces demonstrating language proficiency for the student’s ePortfolio.
- Requirements:
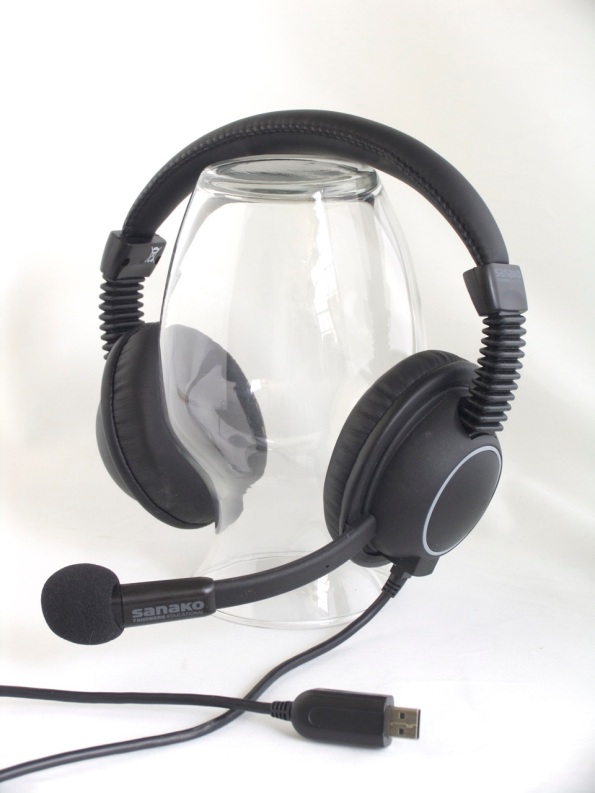
- a quality headset (we use Sanako SLH-07
 )
) - Windows 7 Enterprise/Ultimate with Language Packs,
- knowing how to switch the display language, (optional/recommended:) TBA:a simplified language switching facility,
- individual voice training data: speech recognition users have to train the computer – once, even in a deepfrozen computer enviroinment, since we enabled you to save this data to and restore it from a flash drive or personal network share space,
- a reading text (often authentic texts can be taken straight from the textbook, to fit in with the syllabus, like in this example from Treffpunkt-Deutsch 1st-year German),
- MS-Word with track changes
- screencast software (we use MS community clips)
- a way to submit the results to the teacher (we use Moodle with Kaltura video uploading (example for teachers, students do it similarly), but email could be sufficient depending on screencast length and attachment size allowance).
- a quality headset (we use Sanako SLH-07
Protected: LRC Language Teaching with Technology Faculty Showcase Spring 2013
2013/05/01
Enter your password to view comments.
Which browser and operating system we could get which Moodle Kaltura webcam assignments to work in
2013/02/14
Leave a comment
Below please find our current (work in progress) test matrix. Use one of the combinations that worked (“YES”) to avoid problems when taking or grading webcam assignments (or come to the LRC where we set up a working combination). You can view your version of the Kaltura video player and of Adobe Flash by right-clicking on the Kaltura video window.
Kaltura Webcam assignment GRMN1201 example
2012/12/13
Leave a comment
Categories: e-languages, German, learning-usage-samples, lms, Speaking
kaltura, moodle
Delete the Flash Global Settings if the iMacs webcam displays black frame only
2012/10/11
Leave a comment
- Problem: Safari and (not recommended after last testing round) Firefox both hung on iMAC6 when a student tried to do a Moodle Kaltura Webcam assignment and got to the built-in ISight camera display page.
- Cause: maybe a Flash security problem accessing the web cam? maybe security dialogue was not answered by the student correctly earlier, and the “preference”stored in her account?
- Solution (presumably): System started working again after I deleted the Flash Global settings, by right-clicking on the webcam video preview window like so:

- Ceterum censeo that we need a computer management infrastructure if we want to use MACs for language learning technology. Faronics-Deepfreeze would have prevented this problem, provided we have a software imaging system (CASPER coming up apparently) that can let us start with a usable image, and the staff time to learn and configure 2 usable OS images and dual usable computer management infrastructures. TCO now > TCO dual OS infrastructure > TCO web cams for 45 PCs.
![clip_image001[4] clip_image001[4]](https://thomasplagwitz.com/wp-content/uploads/2013/11/clip_image0014_thumb1.png?w=541&h=373)
![clip_image002[4] clip_image002[4]](https://thomasplagwitz.com/wp-content/uploads/2013/11/clip_image0024_thumb1.png?w=548&h=385)


