Archive
Archive for May, 2013
How to provide students with blended human/computer-automated feedback on their speaking using a dictation with speech recognition assignment screencast
2013/05/08
Leave a comment
- Teachers often feel there is never enough time for grading students’ speaking proficiency. Fortunately, we can now automate feedback on pronunciation using Windows 7 dictation with speech recognition.
- This feature will be available for 7 languages on Windows 7 in the LRC, here is a demo for a reading exercise dictating German.
- An assignment step-by-step could look like this: Students
- record a screencast of their dictation,
- read a text to the computer in MS-Word,
- turn track changes on in MS-Word and correct the text (immediately or after dictation) where the computer could not recognize their speech,
- upload their screencast to Kaltura in Moodle.
- To grade the performance, the teacher has to review only at the very end of the screencast to see how many corrections the student needed to make (when it doubtabout the speech recognition validiiy, the teacher can easily jump to the screencast segment in question and, if necessary, override the speech recognition).
- This could be a regular assignment type since it provides the following benefits:
- immediate automated intelligent feedback for the student
- little grading overhead for the teacher, so that the teacher can concentrate her work on providing aural feedback on student recorded speech as a highlight maybe twice per term, maybe after mock exams before a midterm and final exam
- some multimedia pieces demonstrating language proficiency for the student’s ePortfolio.
- Requirements:
- a quality headset (we use Sanako SLH-07
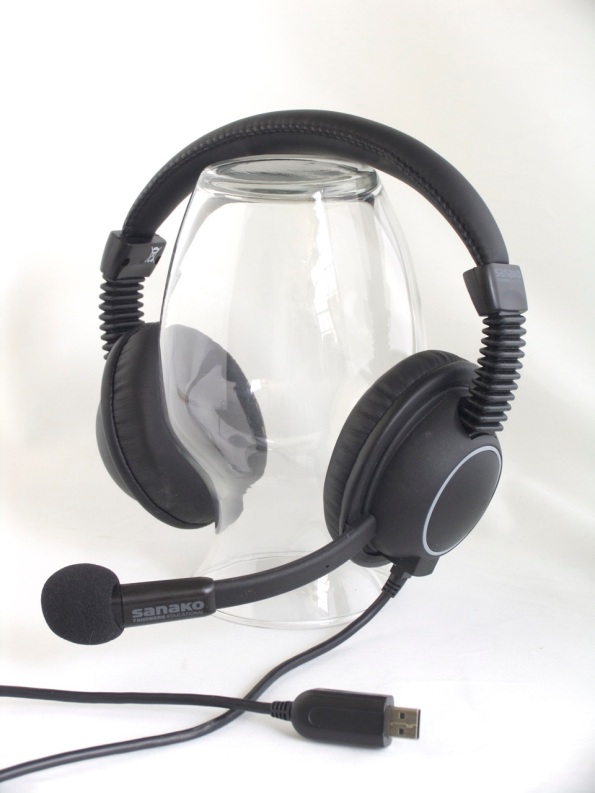 )
) - Windows 7 Enterprise/Ultimate with Language Packs,
- knowing how to switch the display language, (optional/recommended:) TBA:a simplified language switching facility,
- individual voice training data: speech recognition users have to train the computer – once, even in a deepfrozen computer enviroinment, since we enabled you to save this data to and restore it from a flash drive or personal network share space,
- a reading text (often authentic texts can be taken straight from the textbook, to fit in with the syllabus, like in this example from Treffpunkt-Deutsch 1st-year German),
- MS-Word with track changes
- screencast software (we use MS community clips)
- a way to submit the results to the teacher (we use Moodle with Kaltura video uploading (example for teachers, students do it similarly), but email could be sufficient depending on screencast length and attachment size allowance).
- a quality headset (we use Sanako SLH-07

How not to have to join a Saba Centra online class from the LRC late, for lack of speaking capabilities
2013/05/06
Leave a comment
- Problem: We continue getting reports from teachers that students who try to participate in a Saba Centra online class from the LRC listening station computers (with analogue headphones) experience a considerable delay in joining and cause disruption to online classes since they have to troubleshoot their microphones, for lack of being audible online.
- Root cause: Saba Centra on startup automatically selects the “microphone” as recording device…
- Workaround:
- On XP, click “Start”, click “Run”, type (without quotes) “SndVol32 –R” (meaning: “SoundVolume for Recording”), click “OK” which opens the volume mixer for recording devices. The radio button selected will be “Rear input”.

- Start Saba Centra.
- Switch back to the volume mixer you opened in step 1. Note that the radio button now selected is “Microphone”. This is wrong for the listening stations (and the teacher station) in the LRC. Switch it back to “Rear input” (you know that your headset is supposed to be plugged into the rear).

- And off you go… Plus note: There is no need for “expensive” workarounds like:
- haphazardly trying to replug headphones,
- purchasing your own USB headphones,
- hogging the main classroom with its USB headphones.
- On XP, click “Start”, click “Run”, type (without quotes) “SndVol32 –R” (meaning: “SoundVolume for Recording”), click “OK” which opens the volume mixer for recording devices. The radio button selected will be “Rear input”.


Categories: audience-is-language-learning-center-staff, audience-is-language-learning-center-temp-staff, audience-is-students, audience-is-teachers, Distance-education-format-is-Synchronous, e-learning, Listening-Stations, Presenter-Computer, presenter-computer, service-is-configuring-learning-tools, service-is-testing-troubleshooting-debugging, Speaking
audio, FAQs, saba-centra
Saba Centra on startup automatically selects the "microphone" as recording device…
2013/05/03
Leave a comment
- … But we in the language lab use the (dual function microphone/line-in) "rear input" for our headsets (for ergonomic, health&safety and security reasons). Workaround here.
- Apparently this startup behavior cannot be changed within Saba Centra:
- Any startup will bring up the “Audio Wizard” asking users, even in a controlled lab environment, to configure their audio devices,
- and if users do (and choose what they have: headset), make wrong assumptions which audio plug to enable (“Microphone” front panel, even if your headset is plugged into the rear panel dual “line-in/microphone”)
- The workaround according to these easily Googled instructions is using the “Advanced” audio wizard options to override this “Audio Wizard” error, like so:
- “Re-open the Audio Wizard, go to the third screen and change your recording device in your “Recording Device” menu. Advance two slides and determine if you can hear your recorded voice. ”
- 1st screen:

- 3rd screen:

- note the instructions – Click “Advanced”. But it is easier to just use from the start our Workaround here.
- 1st screen:
- “Re-open the Audio Wizard, go to the third screen and change your recording device in your “Recording Device” menu. Advance two slides and determine if you can hear your recorded voice. ”
- The long-term solution is reconfigure your hardware and disable the front panel audio – but will Saba Centra understand you? Stay tuned…


How to upload files into WordPress and link them to articles
2013/05/02
Leave a comment
- In the WordPress “Dashboard” (the landing page after you login as WordPress Admin), in the left menu, click menu item : “Media” / “Add New”., and drag&drop (or browse and select them).
-

-
The upload success is visible immediately:
-

-
In the media library, after uploading media, on the “edit media”, there is an opportunity for adding metadata to files
-

-
How do you link files from an article? Click on button: “Add media”, and drag&drop files. How about previously uploaded files? Click on button: “Add media”, tab:”media library” (instead of the default tab:”upload files”) , ad find your previously uploaded file in the list.
-


Categories: documentation, e-infrastructure
media-library, uploading, wordpress
Sanako Spring 2013 Newsletter is out: Nottingham University now boasts 11 Sanako Study 1200 language labs…
2013/05/02
Leave a comment

…for about the same size undergraduate student body (wow!), emphasizes need for training (I trained in their lab when it was still a Sanako Lab 300). Read the whole Sanako Spring 2013 newsletter here.
Protected: LRC Language Teaching with Technology Faculty Showcase Spring 2013
2013/05/01
Enter your password to view comments.


Questions? Read the About. Or just ask me a quick Our Databases: Resources with calendars -- Language learning material Moodle Sites, multimedia files -- films


FAQs for LRC student staff or for students or for teachers. To search our FAQs, in the browser addressbar, add after "https://plagwitz.wordpress.com/feed/?tag=faqs+/" "+TAG1" (from tag cloud below) OR "https://plagwitz.wordpress.com/feed/tag=faqs
&category_name=" "CAT1" (from category hierarchy below). OR search both categories and tags, and multiple TAGs/CATs (connect with "," for OR-search, with "+" for AND-search), like so: https://plagwitz.wordpress.com/feed/?tag=TAG1+TAG2+...TAGn&category_name=CAT1
+CAT2+...CATn"
Other ways to find help
If you cannot find it here, look there: 5,500 Language-Learning Links and Programs for learning or teaching 150 languages
Shortcuts:Our Lists, Our Maps, LRC Staff Moodle Site,LRC Project Moodle Site, 49erexpress, UNCC Moodle, Student Recordings: s:claslcslrcsanakostudent
Learning usage samples: Sanako oral exam, Kaltura webcam presentation, Dictation with speech recognition, Sanako written exam, Chinese and Japanese interactive stroke-order practice
Test the Sanako Installer, Webbrowser Popup Konfigurator for XP, or Windows7, faster LRC TeacherPC Log-in Let MS facilitate diacritics writing by installing for you US-International keyboard layout
This is my personal blog (Google+). The views expressed on these pages are mine alone and not those of my employer. The information in this weblog is provided “AS IS” with no warranties, and confers no rights.
